The Perfect Tool

I’m always in search of the perfect crochet hook set. I started with Boye and Susan Bates. Those are the cheapest ones you can buy. They are great when you are young but now that I’m older, my hands get more tired. With my pregnancies I got carpal tunnel and the thinner hooks make it hard to crochet. As a gift from my husband, I searched on Etsy for wooden ones, not for ergonomic hooks but just as a nice set. They were from Russia and really nice. The downside to wooden hooks, however, are that they tend to break. I’m not gentle on my hooks and sometimes my stitches are tighter than usual. My favorite size (F) broke and I had to glue it back together. I don’t use my wooden hooks anymore because I don’t want to break every single one. I just keep it in my crochet bag because they are beautiful hooks and my husband got them for me.

So then I got clay ones from Etsy. You know, the ones that are molded onto Boye or Susan Bates hooks. They are very nice and pretty but they fall apart after so many uses. The adhesive that attaches the different clay pieces come apart. I got a really nice Harry Potter one and the hat on the top came off. They are also fragile so pieces can break off if you aren’t careful. I’m pretty rough with my hooks and with kids, they aren’t the best investment.

I then went on Amazon to get Prym hooks. I didn’t read the description and so I didn’t realize they were plastic. All I saw was “ergonomic.” They also had great reviews and were recommended by other crocheters. Plastic isn’t going to go well with me. I had a plastic darning needle once and broke it. I need all the metal tools. Plastic and wood aren’t going to work.

The next ones I tried were not bad. They were from Boye. They are metal ones and have silicone wrapped around the handle. These were nice and were way better for my hands. They also do not fall apart.

I also tried various ergonomic hooks that were not branded. A few were from Temu. They were alright but when it comes to hooks, brands are important. Recently I went in search of a new set. For Valentine’s Day I searched online for “best crochet hooks.” I found the brand Tulip which I recognized as a brand that sells sewing tools. I always read reviews when it comes to buying anything and they were raving. People were saying that they are the best hooks they’ve used and that they are so smooth. I’m always for smooth hooks because who wants to crochet with a hook that keeps getting stuck. I saw them on Amazon and they arrived pretty quickly.

The set I got is Etimo by Tulip. They are so pretty and they are as smooth as people say. I already made a hat with the size 7 and it was just a dream to crochet with. Comfortable and smooth, just like crocheting is suppose to be. The set also comes with a small ruler, 2 needles and a roll-up case. If you are looking to upgrade your crochet game then these are it. They are available on Amazon. Happy crocheting!

Happy Birthday Little One!

It was my daughter’s 1st birthday on the 8th and I thought I would cry but I didn’t. It was definitely the most sentimental 1st birthday because it’s the last. I heard a song on the radio and I’m going to share it here. It’s called These Are The Days by Cory Asbury.

I cried the first time I heard this song. The line where he says, “Darlin’ before we know it, This old house will be quiet”….that line hit me the hardest. I can already feel it now. When it’s quiet or when they are just sitting there watching their shows I look at them and I just want to freeze that moment. Because we’ll never get these moments back. There will come a day when they won’t want those bedtime stories. There will be those days when they won’t come crying to us when they fall. So when I feel frustrated and tired, I will think about this song and try to cherish every moment. No matter how hard parenting is and how mad we get sometimes, these are days we’ll really want back.

How to Make My Melody

A couple of weeks ago I posted something about my daughter’s 1st birthday. It’s a bunny theme and I decided to make little bunnies for party favors. I also made a My Melody for her. I’ve decided to give this pattern for free here on my website.

Materials:

  1. Medium worsted yarn. I used Red Heart Super Saver. Pink, purple, gold, brown, white and cream colors.
  2. Stuffing
  3. Darning needle
  4. Scissors

Ears (Make 2) and Body:

  1. With pink color. 6sc in magic circle. (6)
  2. 2sc in each st. (12)
  3. (1sc in st. 2sc in st.) x 6. (18)
  4. (1sc in next 2st. 2sc in st.) x 6. (24)
  5. 1sc in each st. For 23 rows. See Figure 1. (24)
  6. Connect the 2 ears together. Make sure that you skip 4 stitches from each ear. So you are skipping a total of 8 stitches. This video will show you what I mean by connecting the ears together: https://www.youtube.com/watch?v=V7t7KPY50tk&ab_channel=GoldenJellyBean. See figure 1, 2 and 37. Sew the gap between the ears closed. (40)
  7. (1sc in next 3st. 2sc in st) x 10. (50)
  8. (1sc in next 4st. 2sc in st) x 10. (60)
  9. 1sc in each st for 5 rows. (60)
  10. Crochet until you have about 5 stitches away from the end of the row. Fold your work in half as shown in Figure 5. Each half (front and back) should have 30 stitches each. You will be changing color to cream. The middle of the front should have 10 stitches of white. If you would like to follow what I did for mine, the last stitch from the last row was cream. Then the rest of the 9 cream stitches started the next row. Then do this: (1sc in next 4st. 2sc in st.) x 9. 1sc in the next st. Change to cream. 1sc in next 4st. See Figures 6-9.
  11. 1sc in next 12st. Change to pink. 1sc in the next 50st. Change to cream. 1sc in next 7st.
  12. 1sc in next 15st. Change to pink. 1sc in next 47st. Change to cream. 1sc in next 7st.
  13. 1sc in next 15st. Change to pink. 1sc in the next 47st. Change to cream. 1sc in next 7st.
  14. 1sc in the next 15st. Change to pink. 1sc in next 47st. Change to cream. 1sc in next 7st.
  15. 1sc in the next 15st. Change to pink. 1sc in next 48st. Change to cream. 1sc in next 6st. 
  16. 1sc in next 16st. Change to pink. 1sc in next 47st. Change to cream. 1sc in next 6st.
  17. 1sc in next 16st. Change to pink. 1sc in next 48st. Change to cream. 1sc in next 5st.
  18. 1sc in next 15st. Change to pink. (1sc in next 3st. Sc2tog.) x 9. 1sc in next 5st. Change to cream. 1sc in next 4st.
  19. 1sc in next 15st. Change to pink. (1sc in next 8st. Sc2tog.) x 4. 1sc in next 2st. Change to cream. 1sc in next 3st.
  20. 1sc in next 14st. Change to pink. (1sc in next 4st. Sc2tog.) x 6. 1sc in next 6st.
  21. Change to cream. (1sc in next 4st. Sc2tog.) x 2. Change to pink. (1sc in next 4st. Sc2tog.) x 6. 1sc in next 2st. (42)
  22. (1sc in next 4st. Sc2tog) X 6. (36)
  23. (1sc in next 3st. Sc2tog.) x 6 (30)
  24. (1sc in next 2st. Sc2tog.) x 6 (24)
  25. Change to cream. 2sc in each st. (48)
  26. 1sc in each st. For 10 rows. 
  27. FO. Make the legs.
  28. After finishing the legs, sew them onto the body as shown in the pictures. See Figures 13-16.

Legs (Make 2):

  1. With cream color. 6sc in magic circle. (6)
  2. 2sc in each st. (12)
  3. (1sc in st. 2sc in st.) x 6 (18)
  4. (1sc in next 2st. 2sc in st.) x 6 (24)
  5. (1sc in next 7st. 2sc in st.) x 3. (27)
  6. 1sc in each st. For 16 rows. (27)
  7. (1sc in st. Sc2tog.) x 9 (18)
  8. Sc2tog x 9. (9)
  9. Sc2tog x 3. Sew gap closed.
  10. Sew the legs together as shown in Figures 11 and 12.
  11. Then sew the legs onto the body as shown in Figures 13-16.

Arms (Make 2):

  1. With cream color. 6sc in magic circle. (6)
  2. 2sc in each st. (12)
  3. (1sc in st. 2sc in st.) x 6 (18)
  4. 1sc in each st. For 7 rows. (18)
  5. (1sc in next 4st. Sc2tog.) x 3 (15)
  6. 1sc in each st. For 3 rows.
  7. (1sc in next 3st. Sc2tog.) x 3 (12)
  8. 1sc in each st. For 3 rows.
  9. (1sc in next 2st. Sc2tog) x 3 (9)
  10. (1sc in st. Sc2tog.) x 3 (6)
  11. FO. Sew gap closed.
  12. Sew arms on, making sure to put the smaller part at the top. See Figures 18 and 19.

Hat Collar (this part goes around her neck):

  1. With pink color. Chain 28.
  2. 1sc in each chain starting in the second chain from the hook. (27)
  3. Chain 1. Turn. 1sc in each st. (27)
  4. Chain 1. Turn. (1sc in next 8st. 2sc in st.) x 3 (30)
  5. Chain 1. Turn. (1sc in next 5st. 2sc in st.) x 6 (36)
  6. Chain 1. Turn. 1sc in each st. Do this for 2 rows. Sew around her neck. See Figures 21-23.

Fold one of the ears down and sew it to secure it. See Figures 24 and 25.

Flower:

  1. We will first make the petals. Use purple color. 6sc in magic circle. (6)
  2. 1sc in each st. (6)
  3. 2sc in each st. (12)
  4. 1sc in each st. (12)
  5. (1sc in st. 2sc in st.) x 6 (18)
  6. 1sc in each st. For 3 rows. (18)
  7. (1sc in st. Sc2tog.) x 6. (12)
  8. Sc2tog x 6. (6)
  9. Sew gap closed. Do not stuff.
  10. Make 5 other petals. Then sew them together. See Figures 26 and 27.
  11. For the middle part of the flower, use gold color. 6sc in magic circle. (6)
  12. 2sc in each st. (12)
  13. FO. Then sew this onto the middle of the flower (Figure 28). Sew the flower onto her head. I placed my flower on the side of the folded ear (Figures 35 and 36).

Face:

  1. Use brown yarn to embroider her eyes. I used white at the corners of her eyes to make them more alive.
  2. Use gold yarn to embroider her nose.
  3. Finally, use brown yarn to embroider her mouth.
  4. Use the images as a guide for what shapes to make the eyes, nose and mouth. See Figures 29-34.

Hello 2024!

It’s been a while since I’ve actually sat down and blogged about anything. Life just happened and laziness set in. I had been using the busyness of life to put off writing. So I decided to finally start!

2023 was pretty eventful with the birth of our 4th child. We had a daughter and named her Evelyn. It’s tricky with names because we have filtered through so many names already. I’m surprised the name Evelyn stuck out and we never chose it before. It’s even more shocking that it’s been almost a year now since she’d been born. I can believe she is already 11 months!!! I’ve been planning her 1st birthday and decided to make little bunny keychains for her party favors. It’s always this daunting task because I have to make about 12-13 of them. So far I only have 5 but I still have time. The reason why they are bunnies is because she was born in the year of the rabbit.

Besides making the keychains, I’ve crocheted a few ornaments for our tree last year. I’ve also acquired some crocheted snowflakes from my mother-in-law. I’m trying to create a “homemade” tree with lots of crocheted ornaments. I even made a tree skirt to go with the theme. And of course it is nerd themed. It took me several months to make it. I still want to add to it. I want to embroider some Christmas lights and maybe put more stars. For our smaller tree I made a popcorn garland. I crocheted the popcorn and got beads that represent each of our family members to put in between. I originally wanted to make it for our main tree but it was getting too much for me at the time so I decided to make it short for now. I can always add to it later.

Last year we became obsessed with Super Mario Bros after we saw the movie. It was my son’s first theater movie and when it came out on Netflix we’ve been rewatching it a number of times. I fell in love with the characters all over again. It was filled with such nostalgia and it was written perfectly. I just had to crochet something from the movie. I chose toad. He’s just so cute and I’ve never made him before. There’s no pattern for him. I just made him for the fun of it and didn’t want to stress out about it.

I will definitely post more updates on current projects. Let me know what you guys are working on too. I would love to know.

Crocheted PuppyCat from Bee and PuppyCat

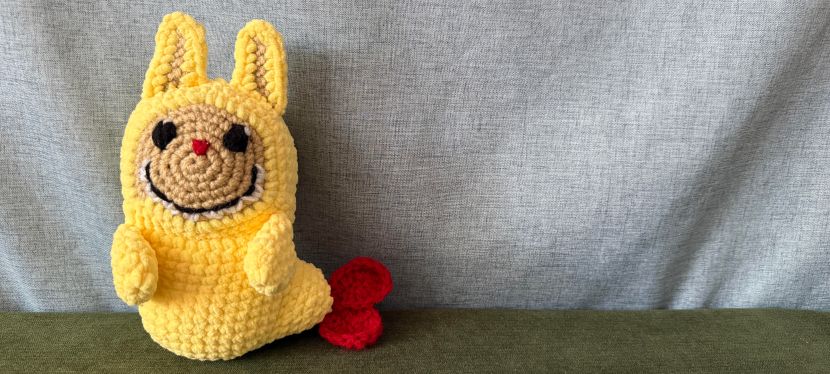
I first heard about Bee and PuppyCat many years ago on YouTube. Back then they only had a few episodes and not many people knew about them. It’s a fun show that has anime themes. It’s a little odd but that’s the charm of the show. Now they have episodes on Netflix. It was so surprised that Netflix finally picked up the show.

So then I was inspired to make PuppyCat. Is he a cat or a puppy? No one really knows. But that’s why he so beloved right? If you would like to make him too, please check out my Etsy link here: Crocheted PuppyCat.