A couple of weeks ago I posted something about my daughter’s 1st birthday. It’s a bunny theme and I decided to make little bunnies for party favors. I also made a My Melody for her. I’ve decided to give this pattern for free here on my website.
Level: Intermediate, must have some sewing and embroidery experience
Type of stitch used to sew pieces together: Whip stitch
NOTE: Stuff as you go along. The only thing not stuffed is the flower.
Materials:
- Medium worsted yarn. I used Red Heart Super Saver. Pink, purple, gold, brown, white and cream colors.
- Stuffing
- Darning needle
- Scissors
Ears (Make 2) and Body:
- With pink color. 6sc in magic circle. (6)
- 2sc in each st. (12)
- (1sc in st. 2sc in st.) x 6. (18)
- (1sc in next 2st. 2sc in st.) x 6. (24)
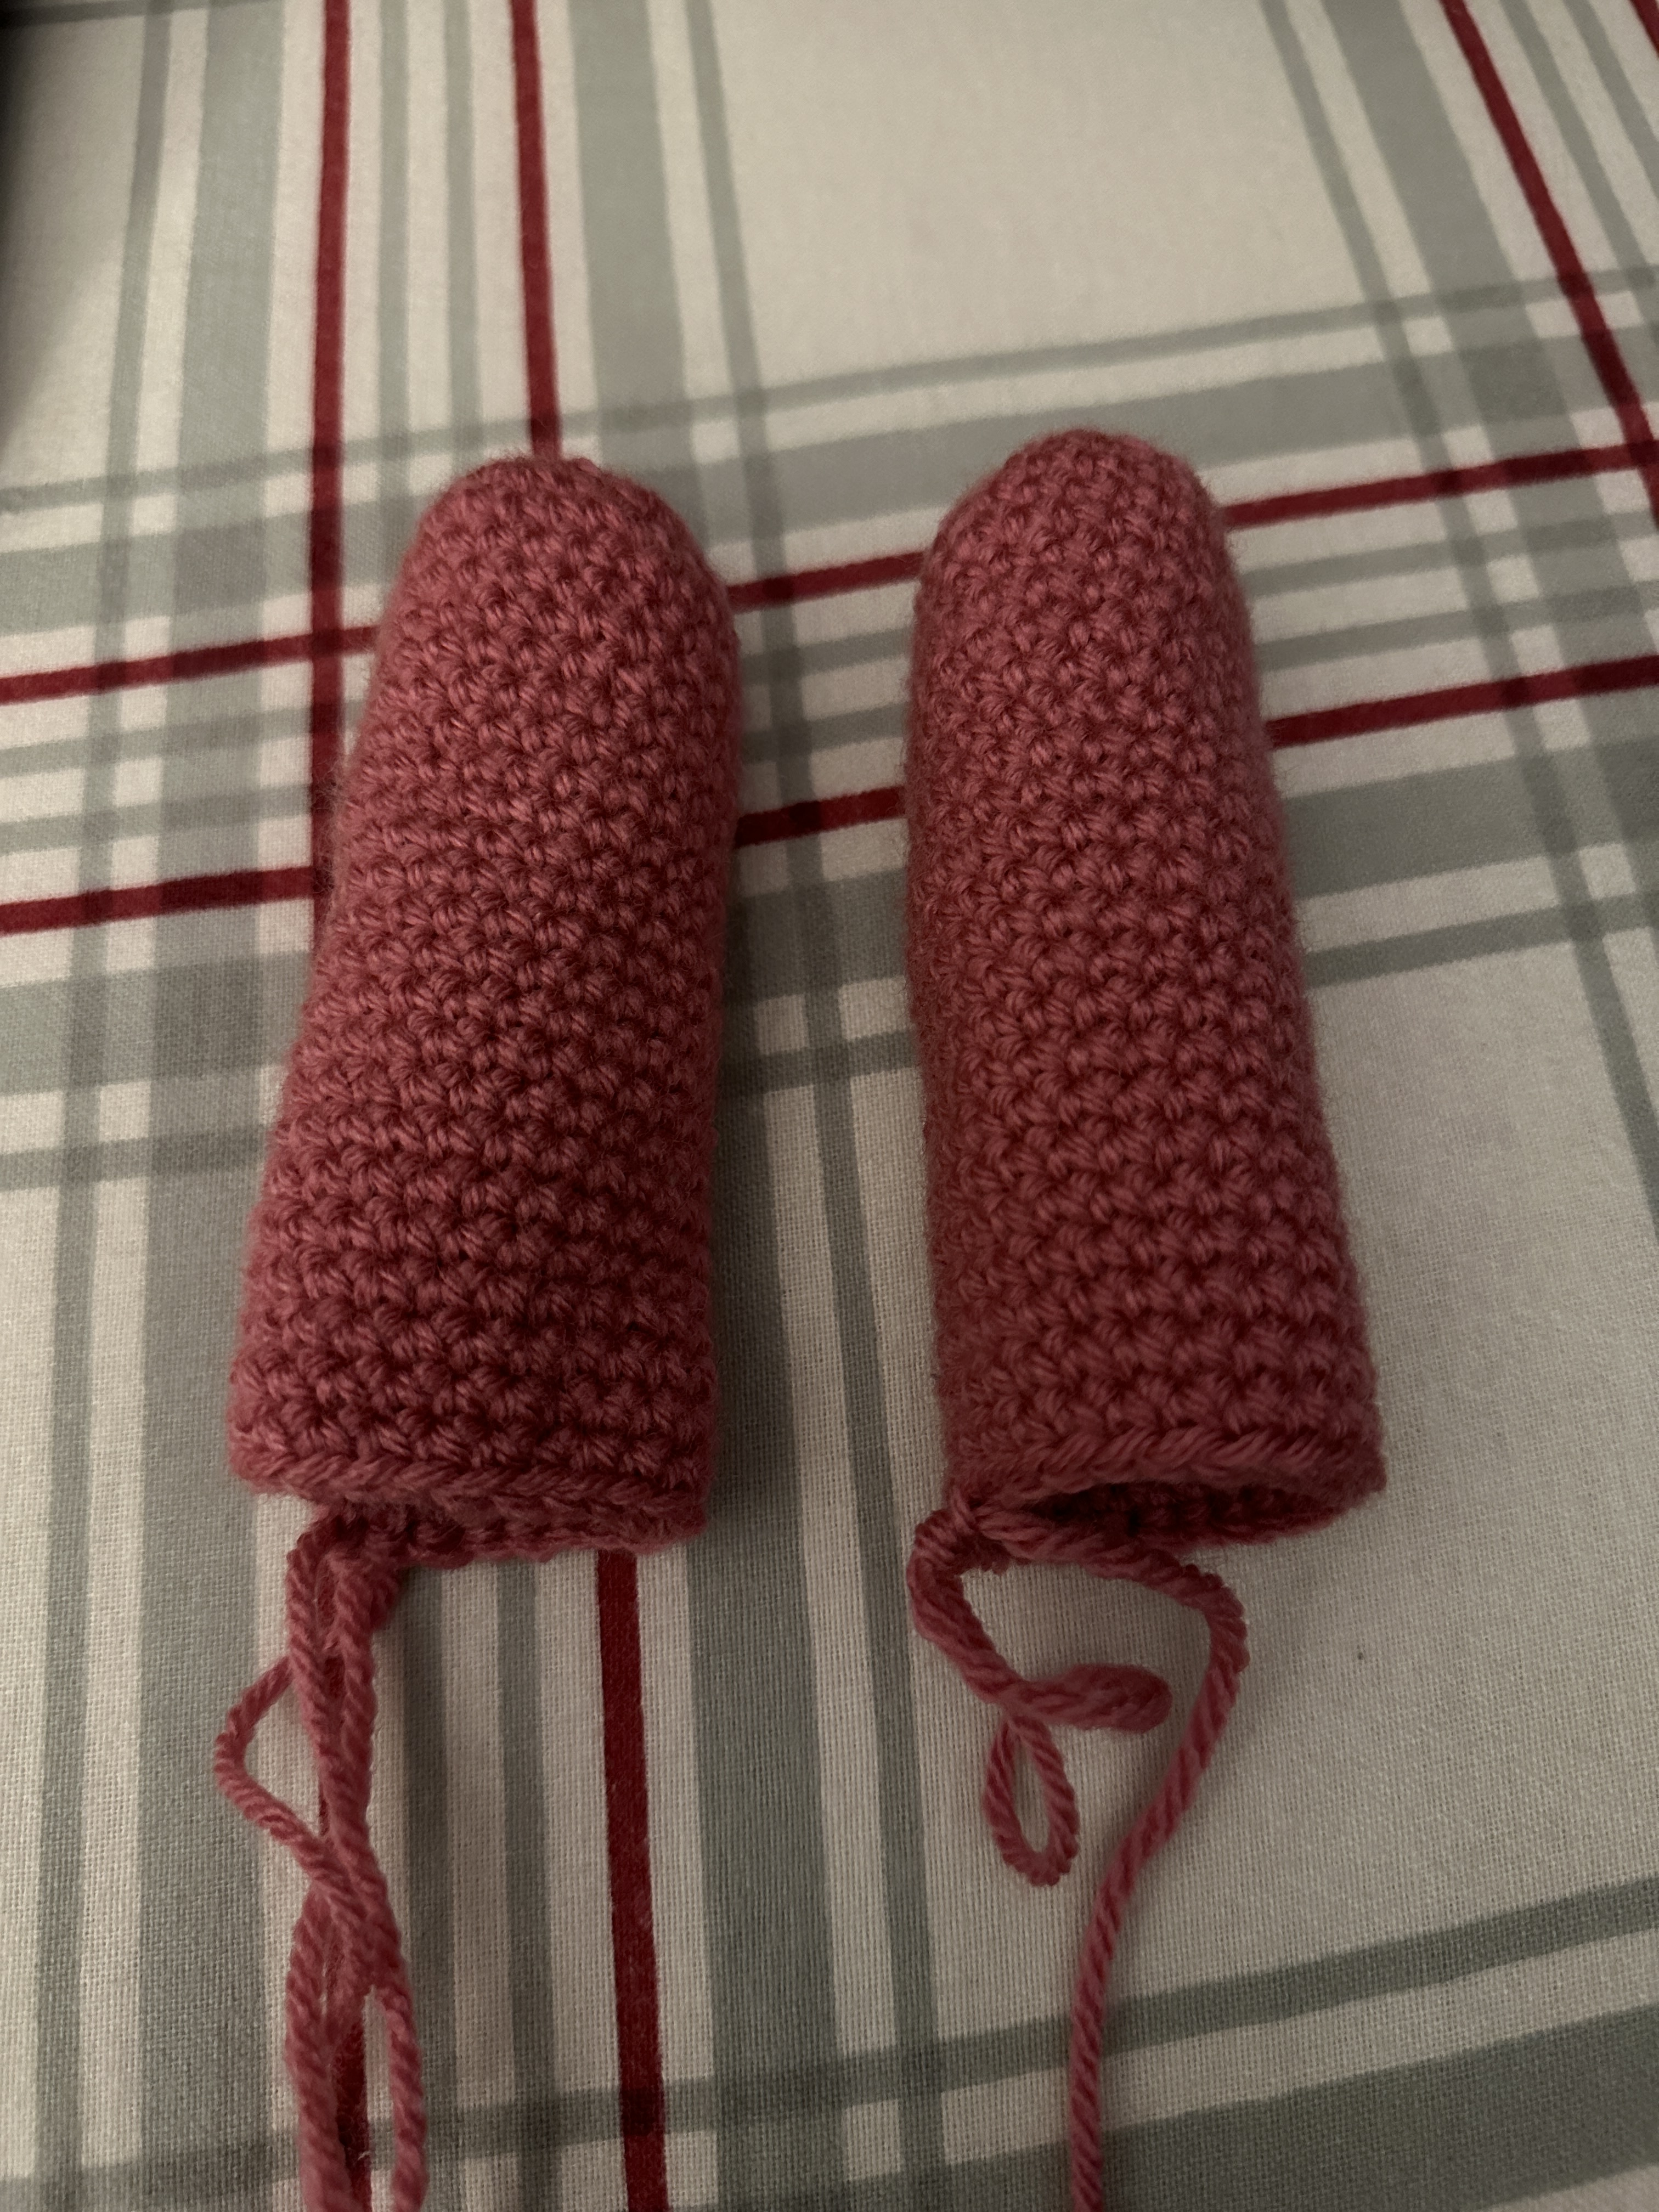
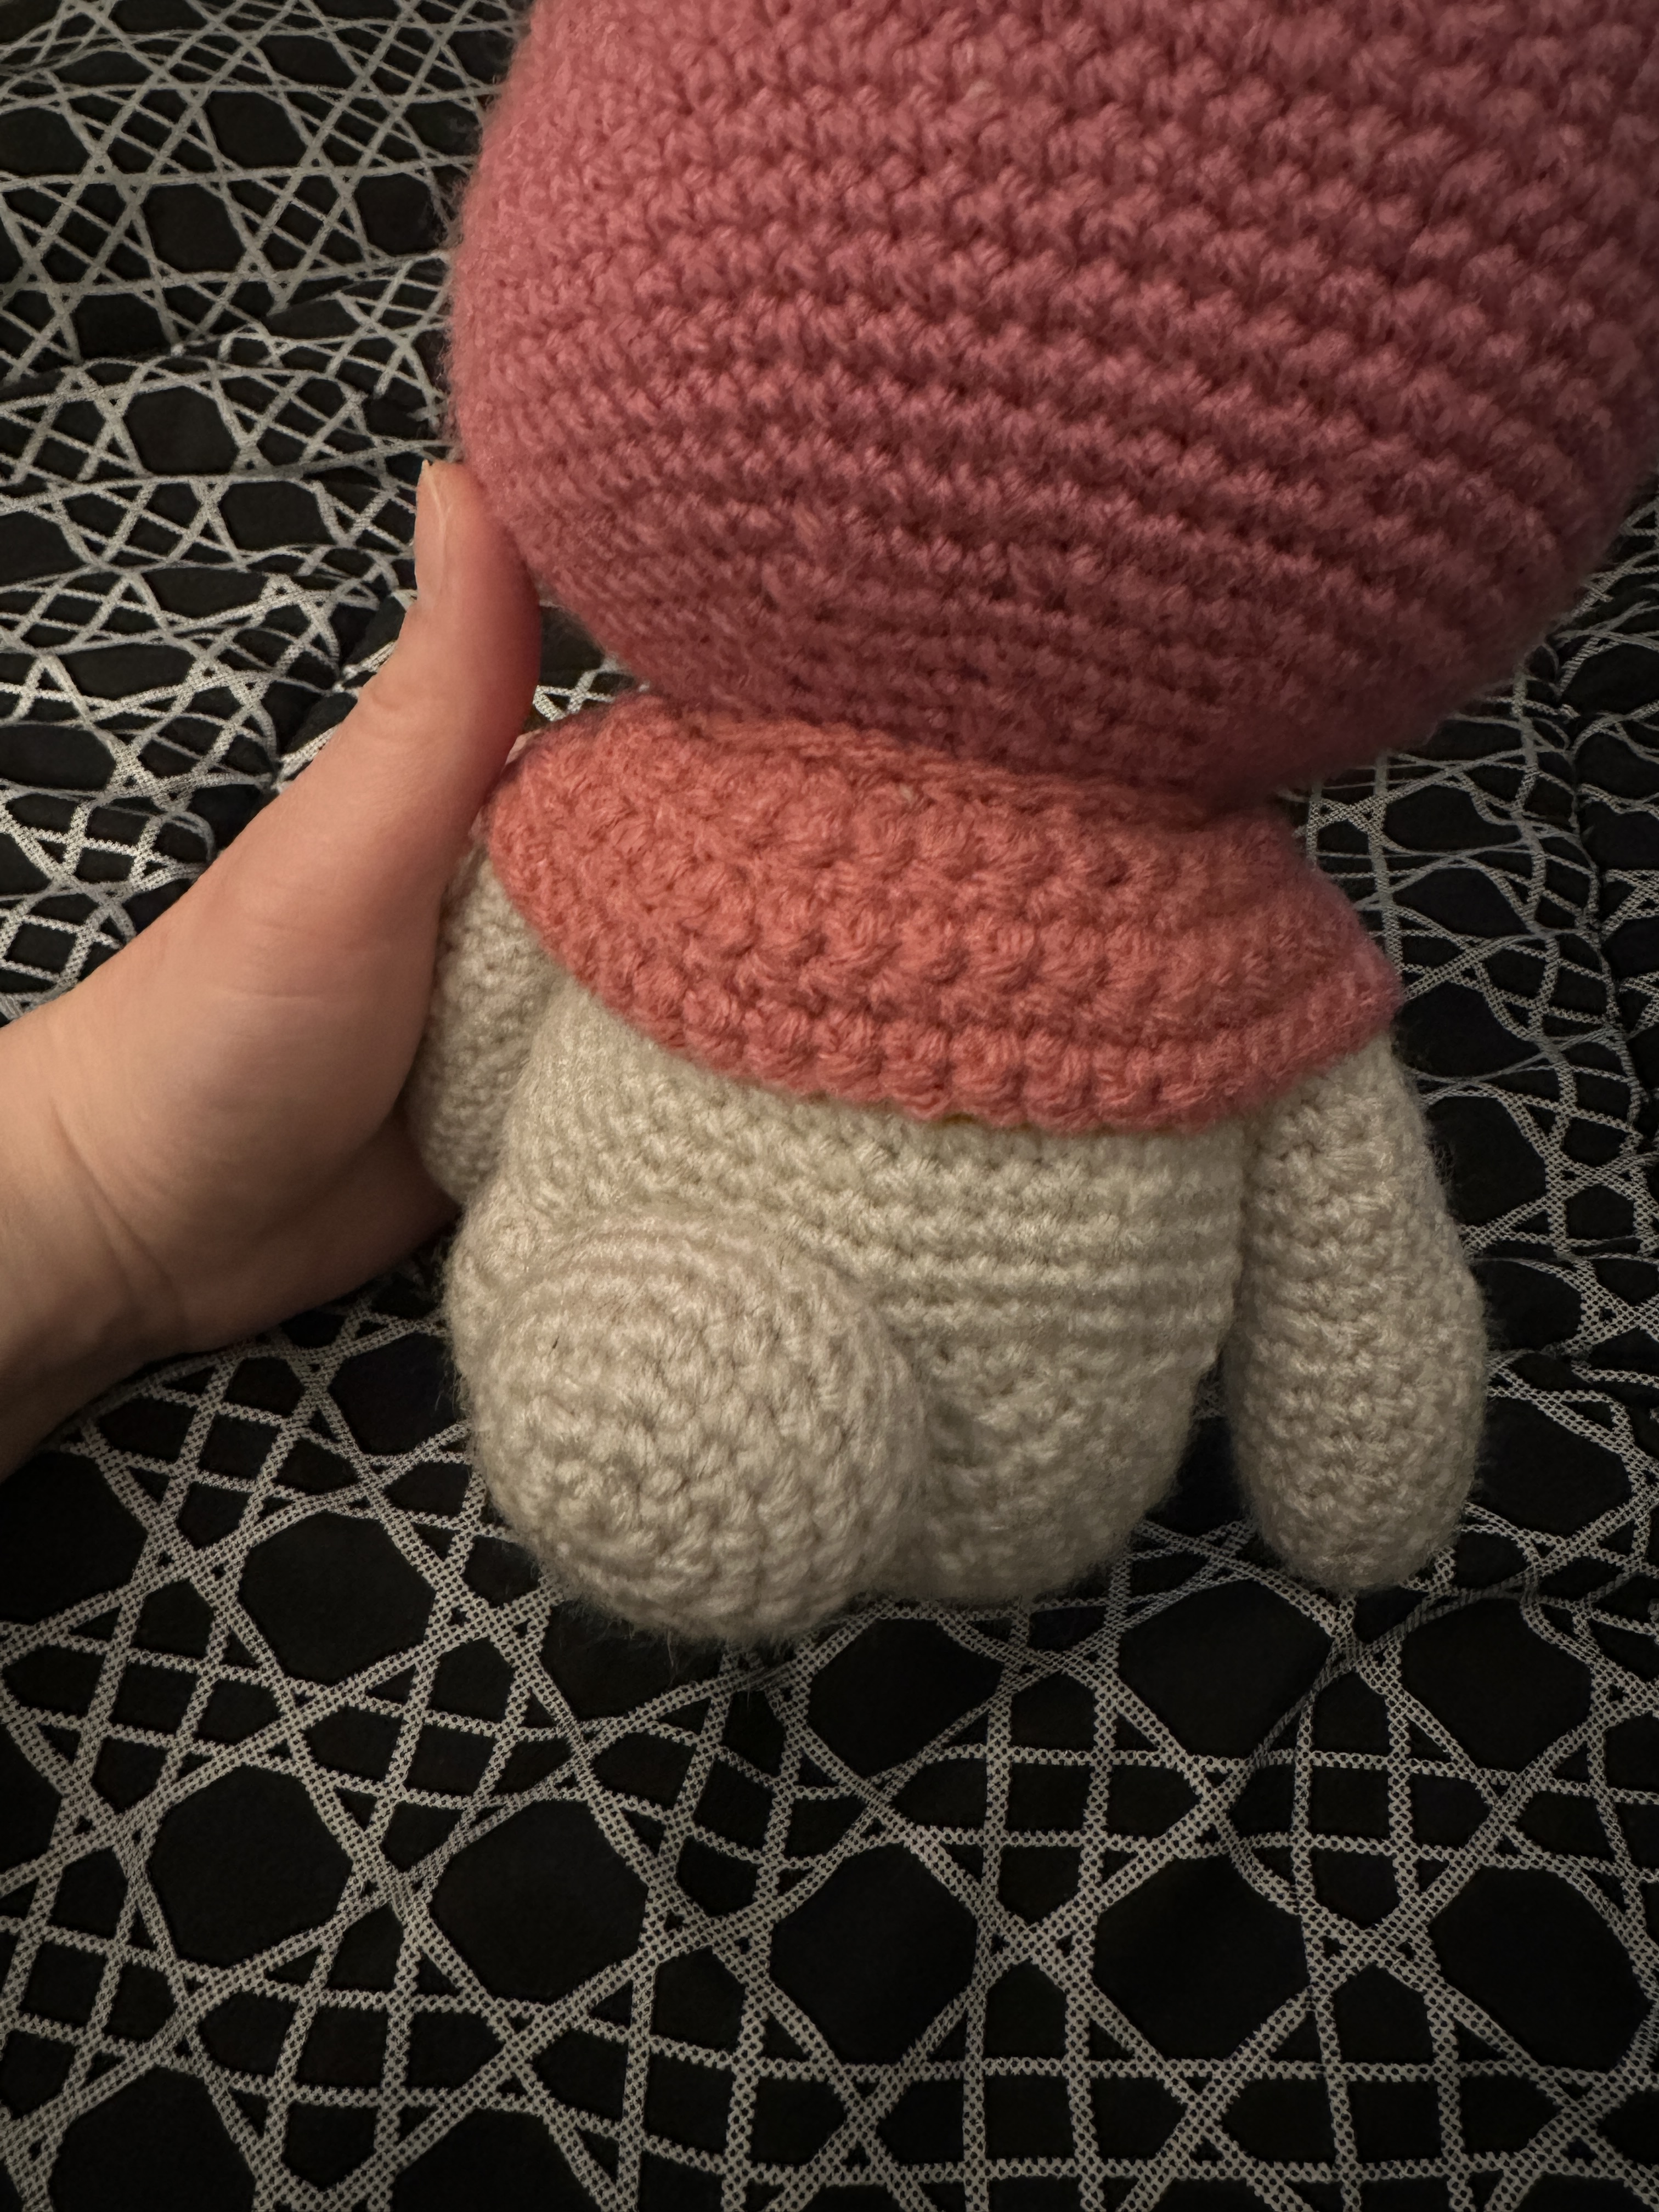
- 1sc in each st. For 23 rows. See Figure 1. (24)
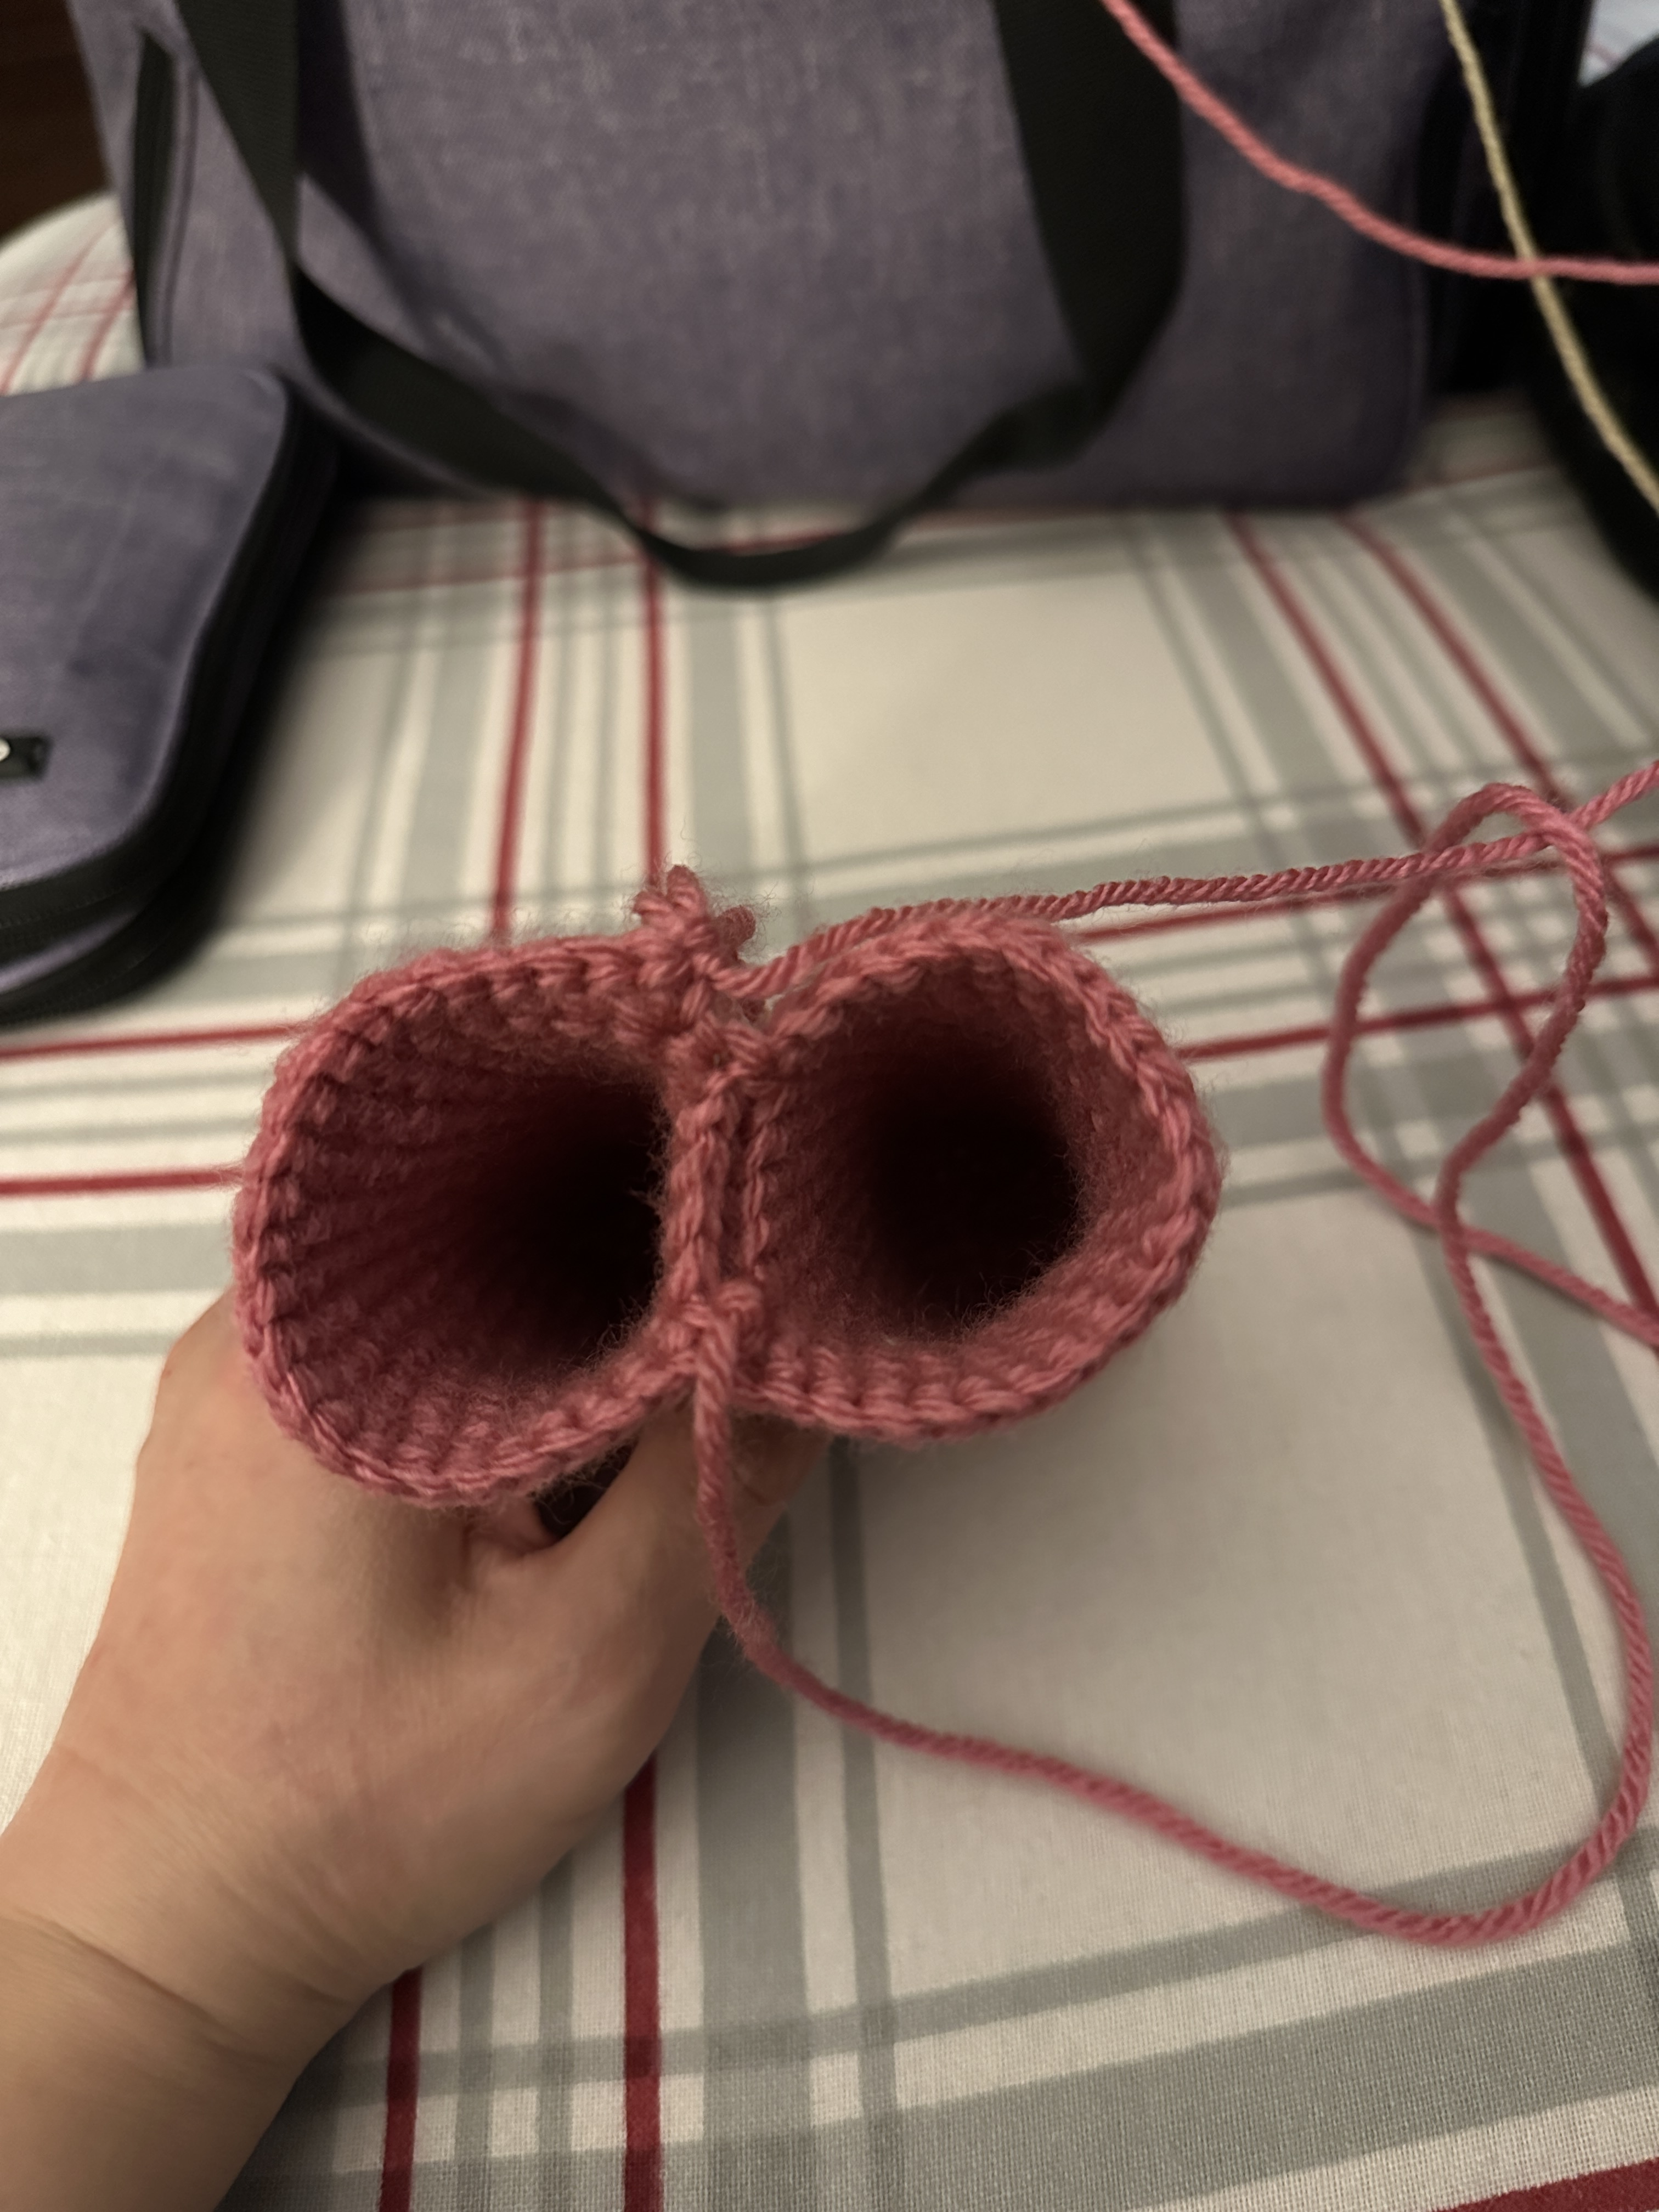
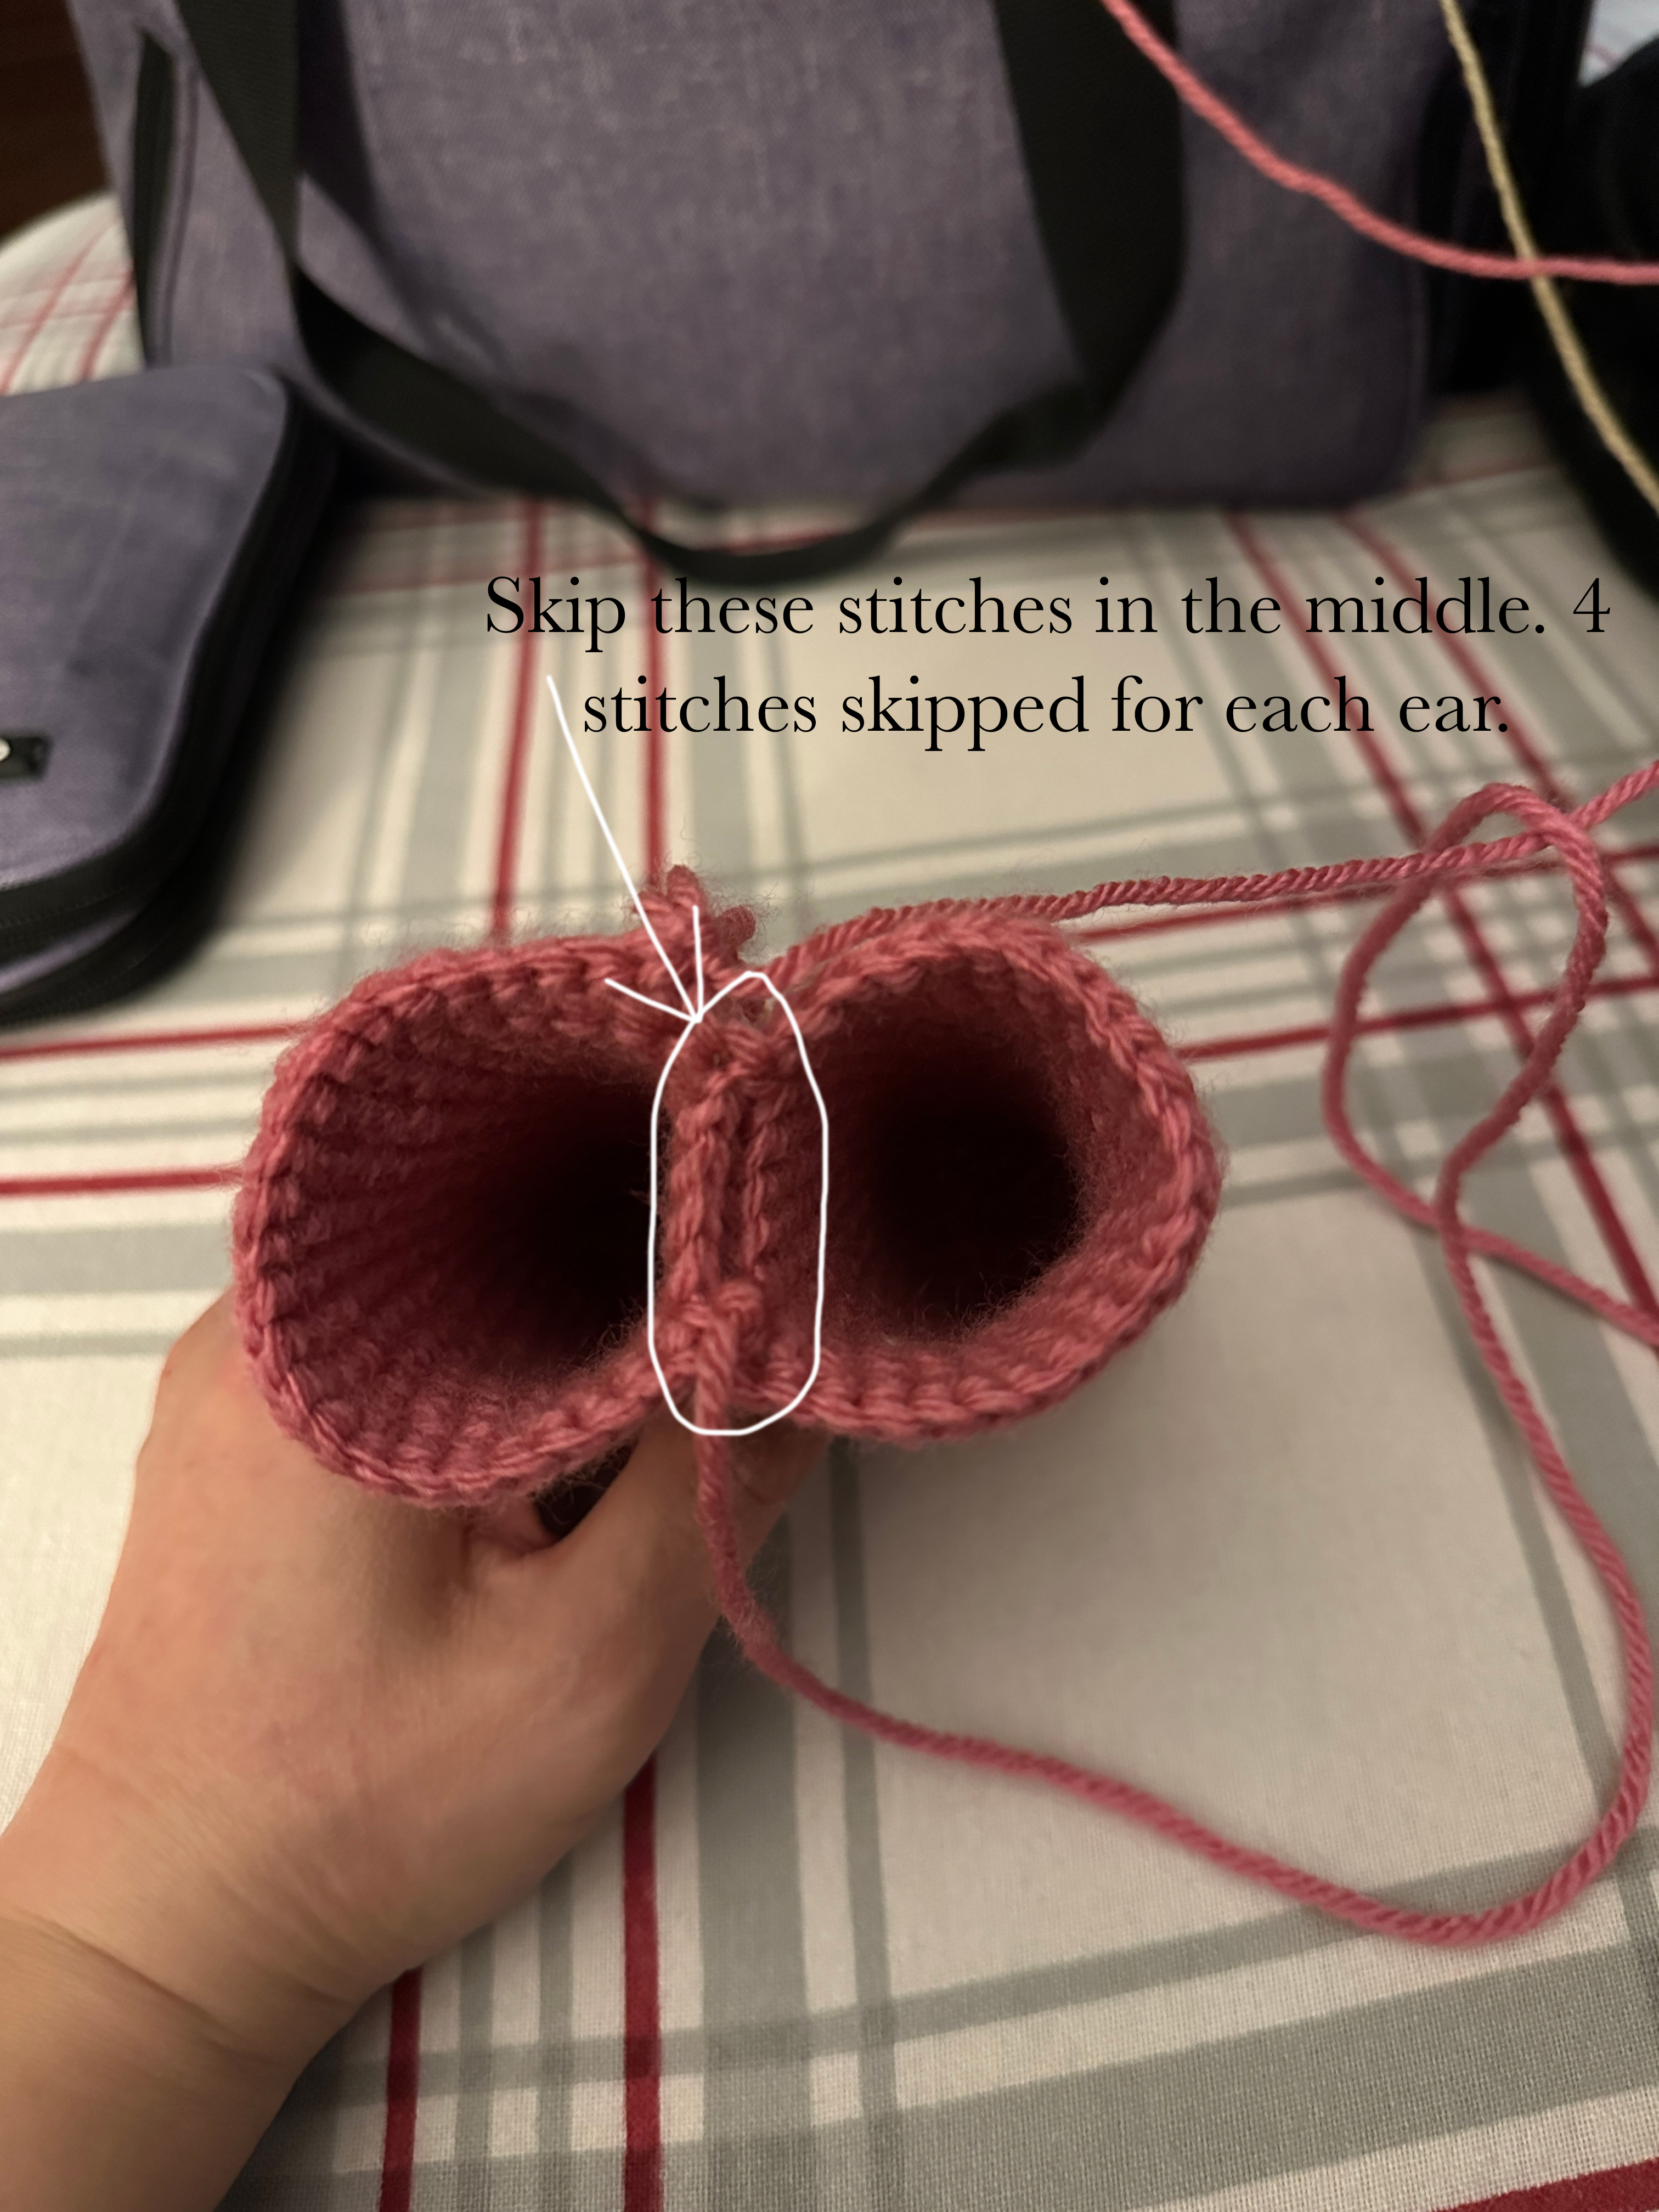
- Connect the 2 ears together. Make sure that you skip 4 stitches from each ear. So you are skipping a total of 8 stitches. This video will show you what I mean by connecting the ears together: https://www.youtube.com/watch?v=V7t7KPY50tk&ab_channel=GoldenJellyBean. See figure 1, 2 and 37. Sew the gap between the ears closed. (40)
- (1sc in next 3st. 2sc in st) x 10. (50)
- (1sc in next 4st. 2sc in st) x 10. (60)
- 1sc in each st for 5 rows. (60)
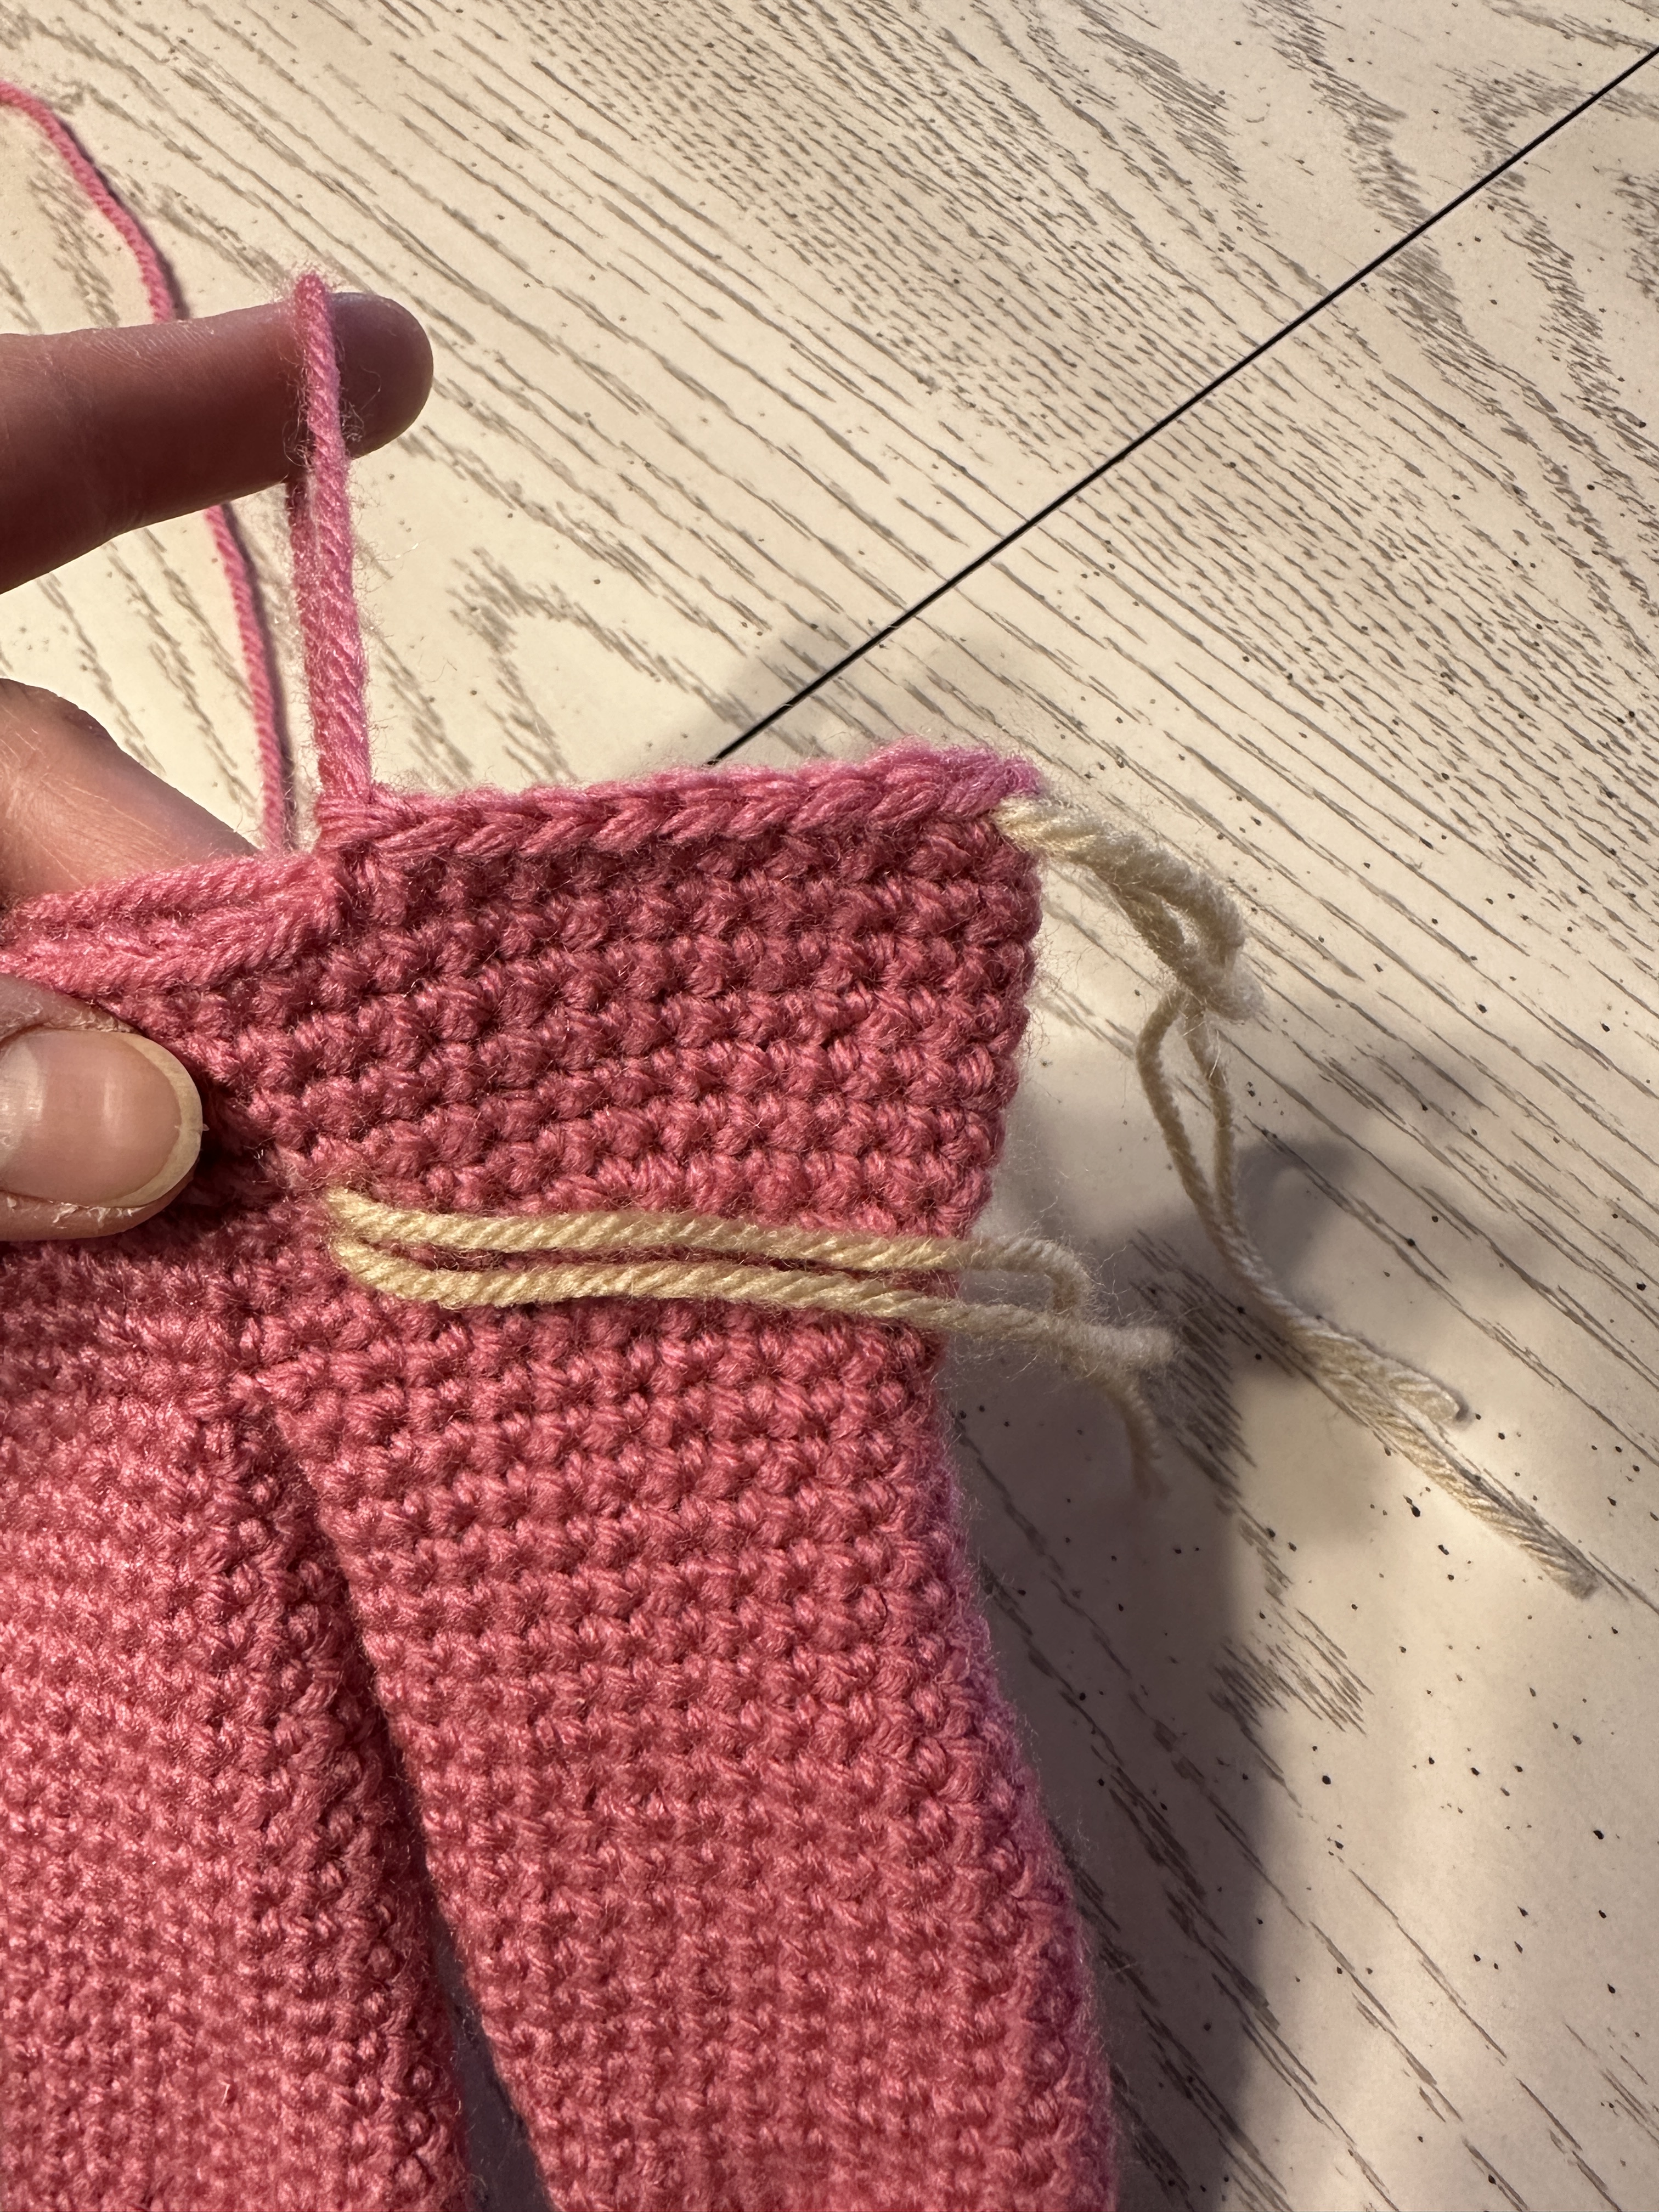
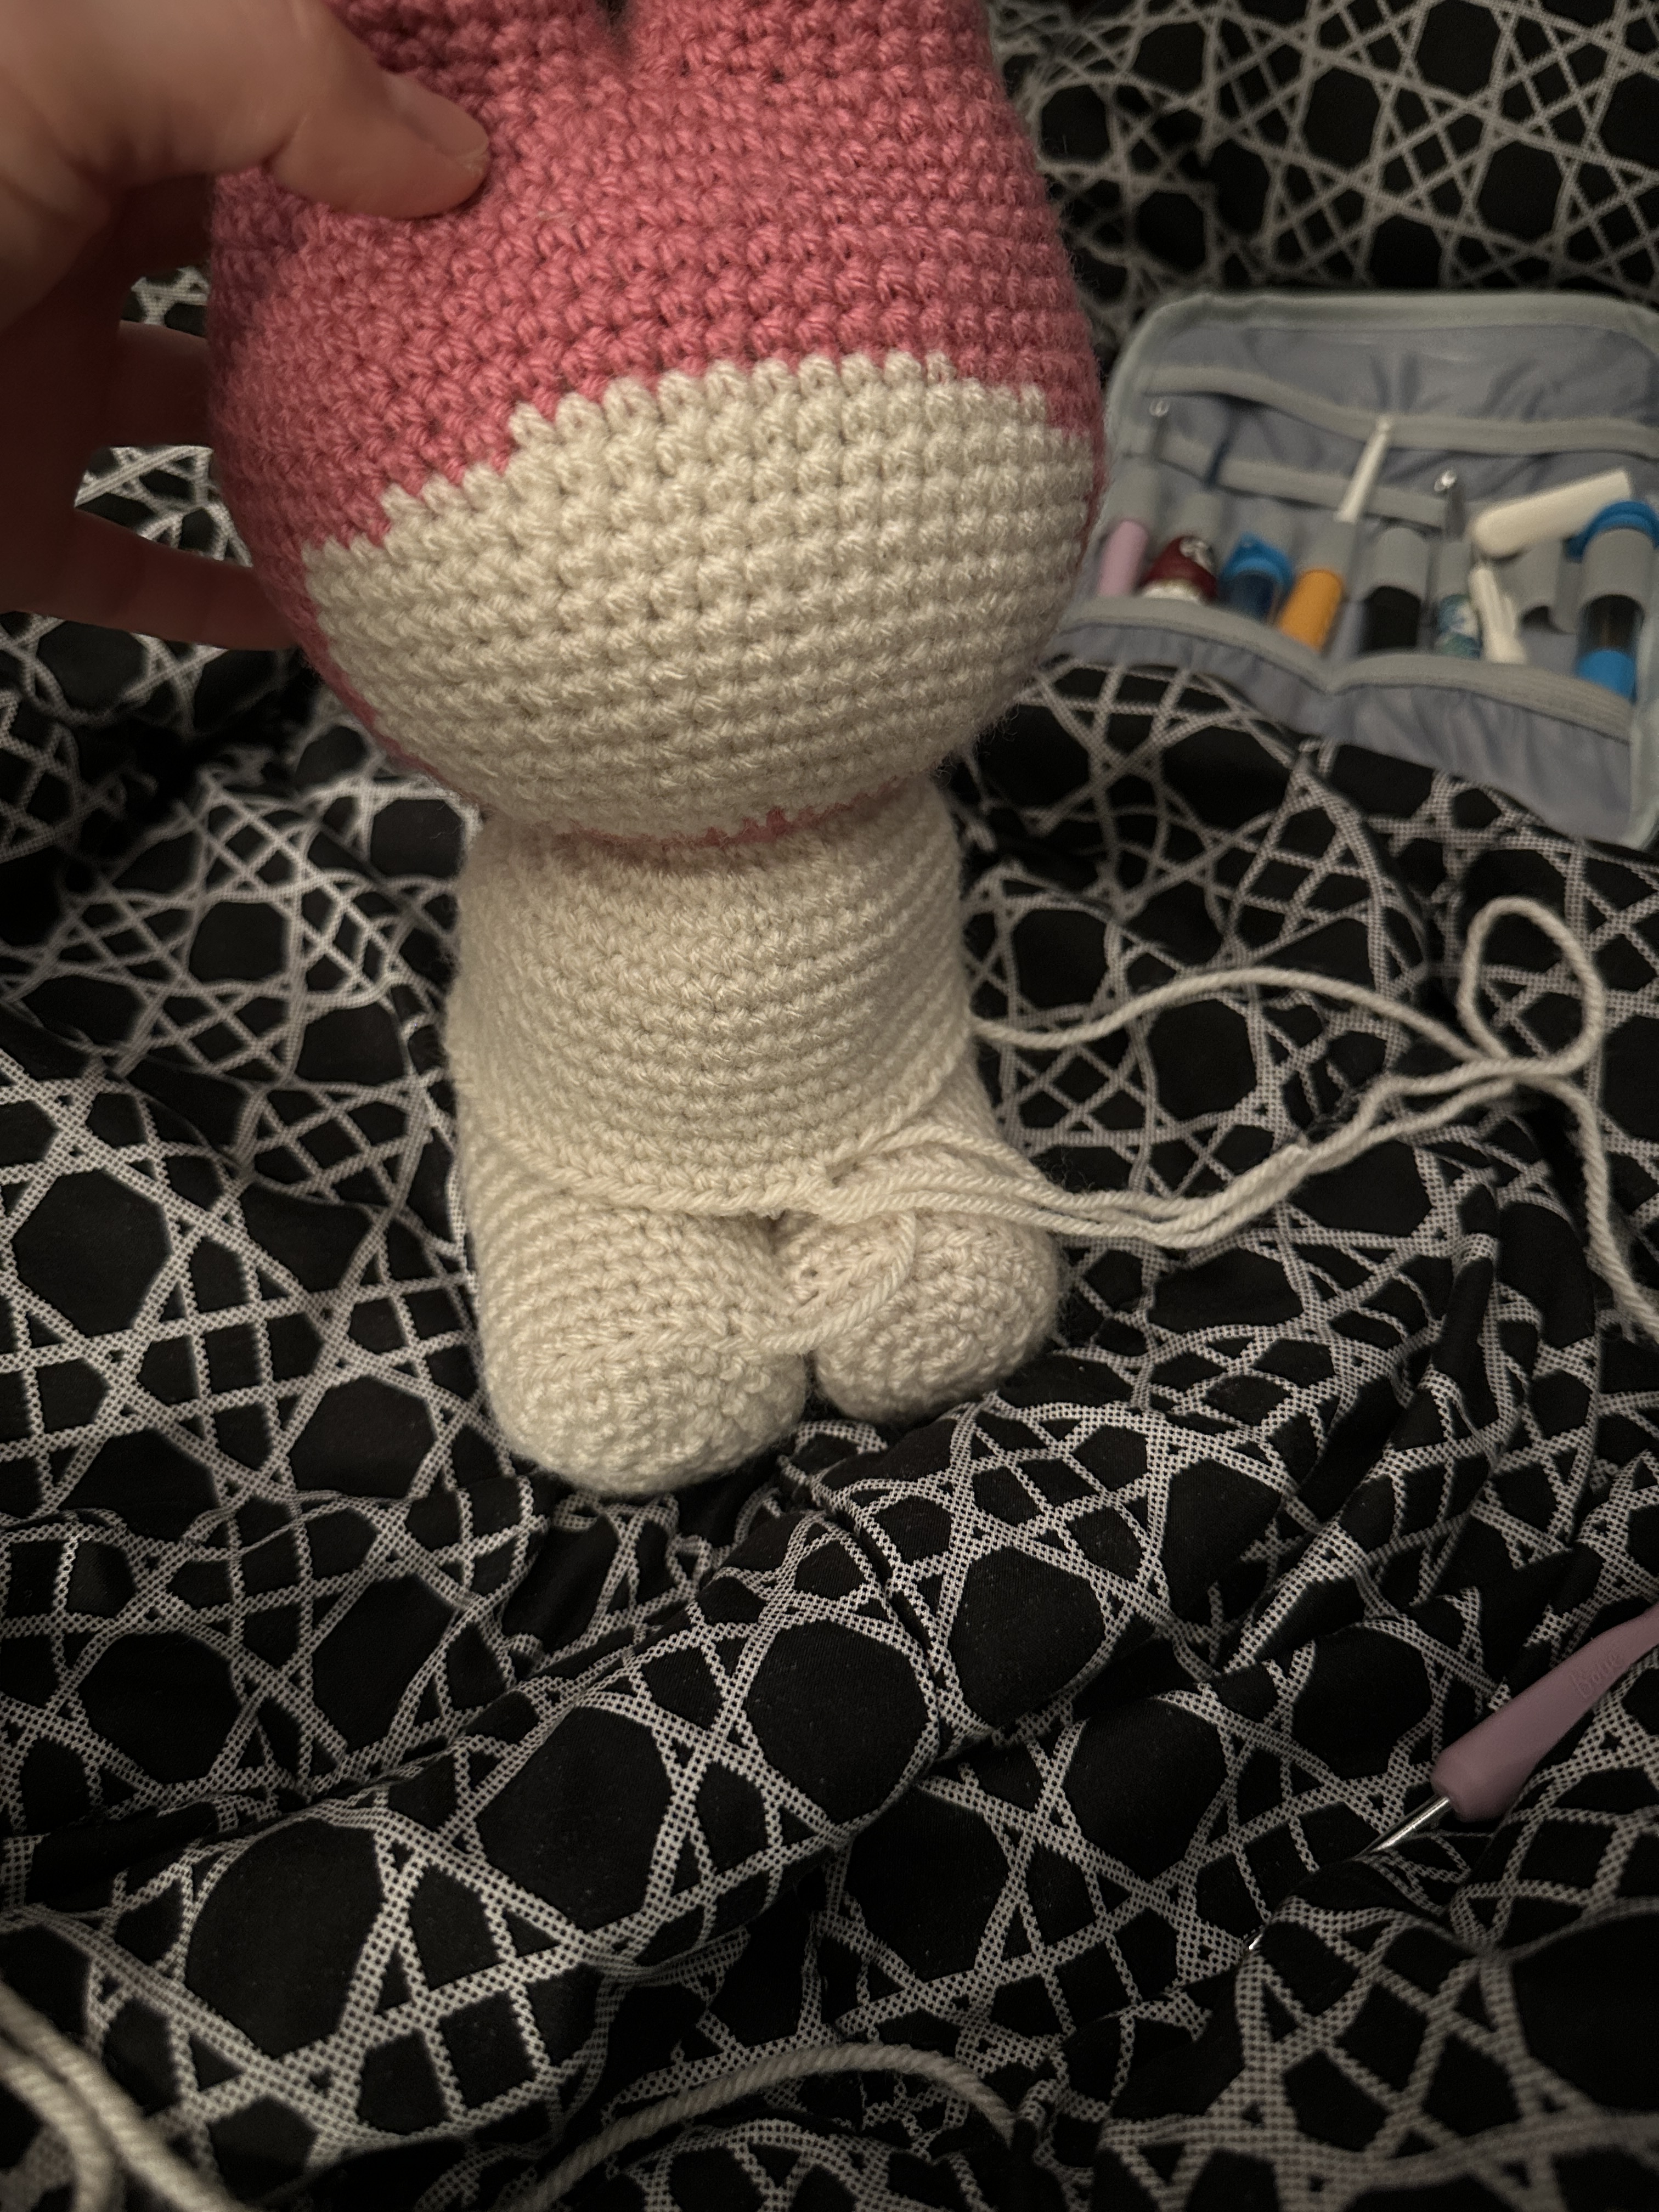
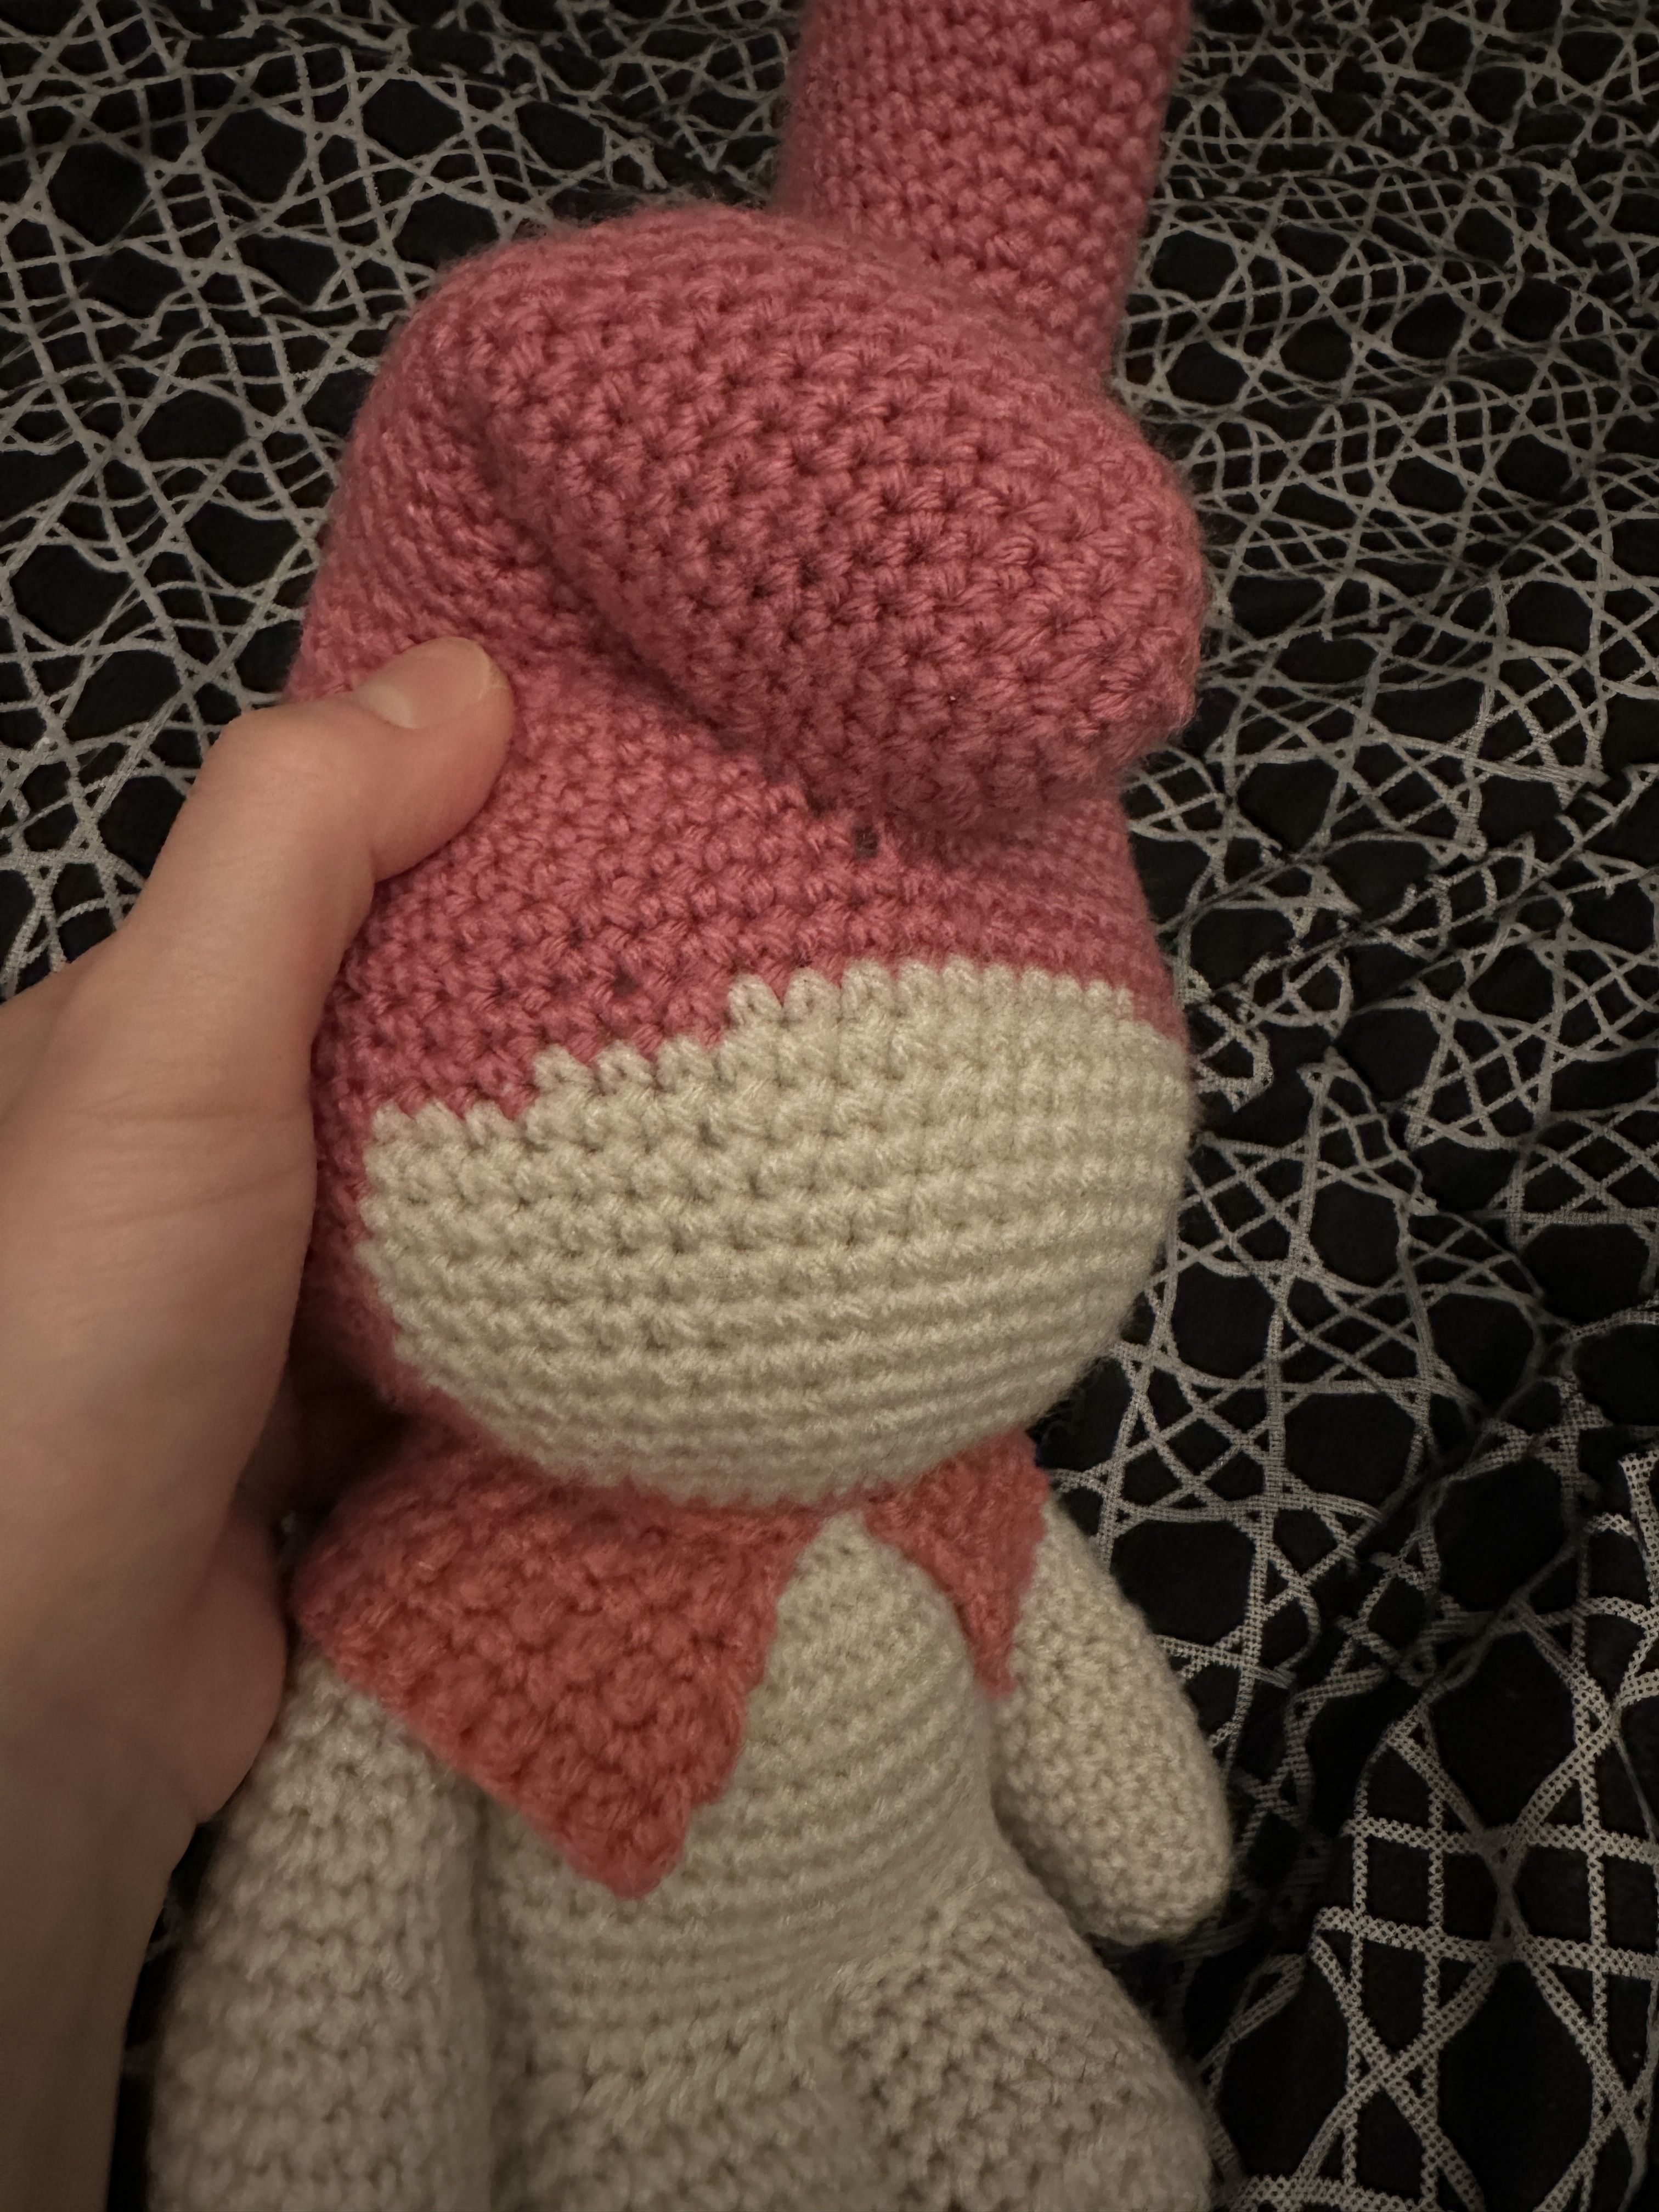
- Crochet until you have about 5 stitches away from the end of the row. Fold your work in half as shown in Figure 5. Each half (front and back) should have 30 stitches each. You will be changing color to cream. The middle of the front should have 10 stitches of white. If you would like to follow what I did for mine, the last stitch from the last row was cream. Then the rest of the 9 cream stitches started the next row. Then do this: (1sc in next 4st. 2sc in st.) x 9. 1sc in the next st. Change to cream. 1sc in next 4st. See Figures 6-9.
- 1sc in next 12st. Change to pink. 1sc in the next 50st. Change to cream. 1sc in next 7st.
- 1sc in next 15st. Change to pink. 1sc in next 47st. Change to cream. 1sc in next 7st.
- 1sc in next 15st. Change to pink. 1sc in the next 47st. Change to cream. 1sc in next 7st.
- 1sc in the next 15st. Change to pink. 1sc in next 47st. Change to cream. 1sc in next 7st.
- 1sc in the next 15st. Change to pink. 1sc in next 48st. Change to cream. 1sc in next 6st.
- 1sc in next 16st. Change to pink. 1sc in next 47st. Change to cream. 1sc in next 6st.
- 1sc in next 16st. Change to pink. 1sc in next 48st. Change to cream. 1sc in next 5st.
- 1sc in next 15st. Change to pink. (1sc in next 3st. Sc2tog.) x 9. 1sc in next 5st. Change to cream. 1sc in next 4st.
- 1sc in next 15st. Change to pink. (1sc in next 8st. Sc2tog.) x 4. 1sc in next 2st. Change to cream. 1sc in next 3st.
- 1sc in next 14st. Change to pink. (1sc in next 4st. Sc2tog.) x 6. 1sc in next 6st.
- Change to cream. (1sc in next 4st. Sc2tog.) x 2. Change to pink. (1sc in next 4st. Sc2tog.) x 6. 1sc in next 2st. (42)
- (1sc in next 4st. Sc2tog) X 6. (36)
- (1sc in next 3st. Sc2tog.) x 6 (30)
- (1sc in next 2st. Sc2tog.) x 6 (24)
- Change to cream. 2sc in each st. (48)
- 1sc in each st. For 10 rows.
- FO. Make the legs.
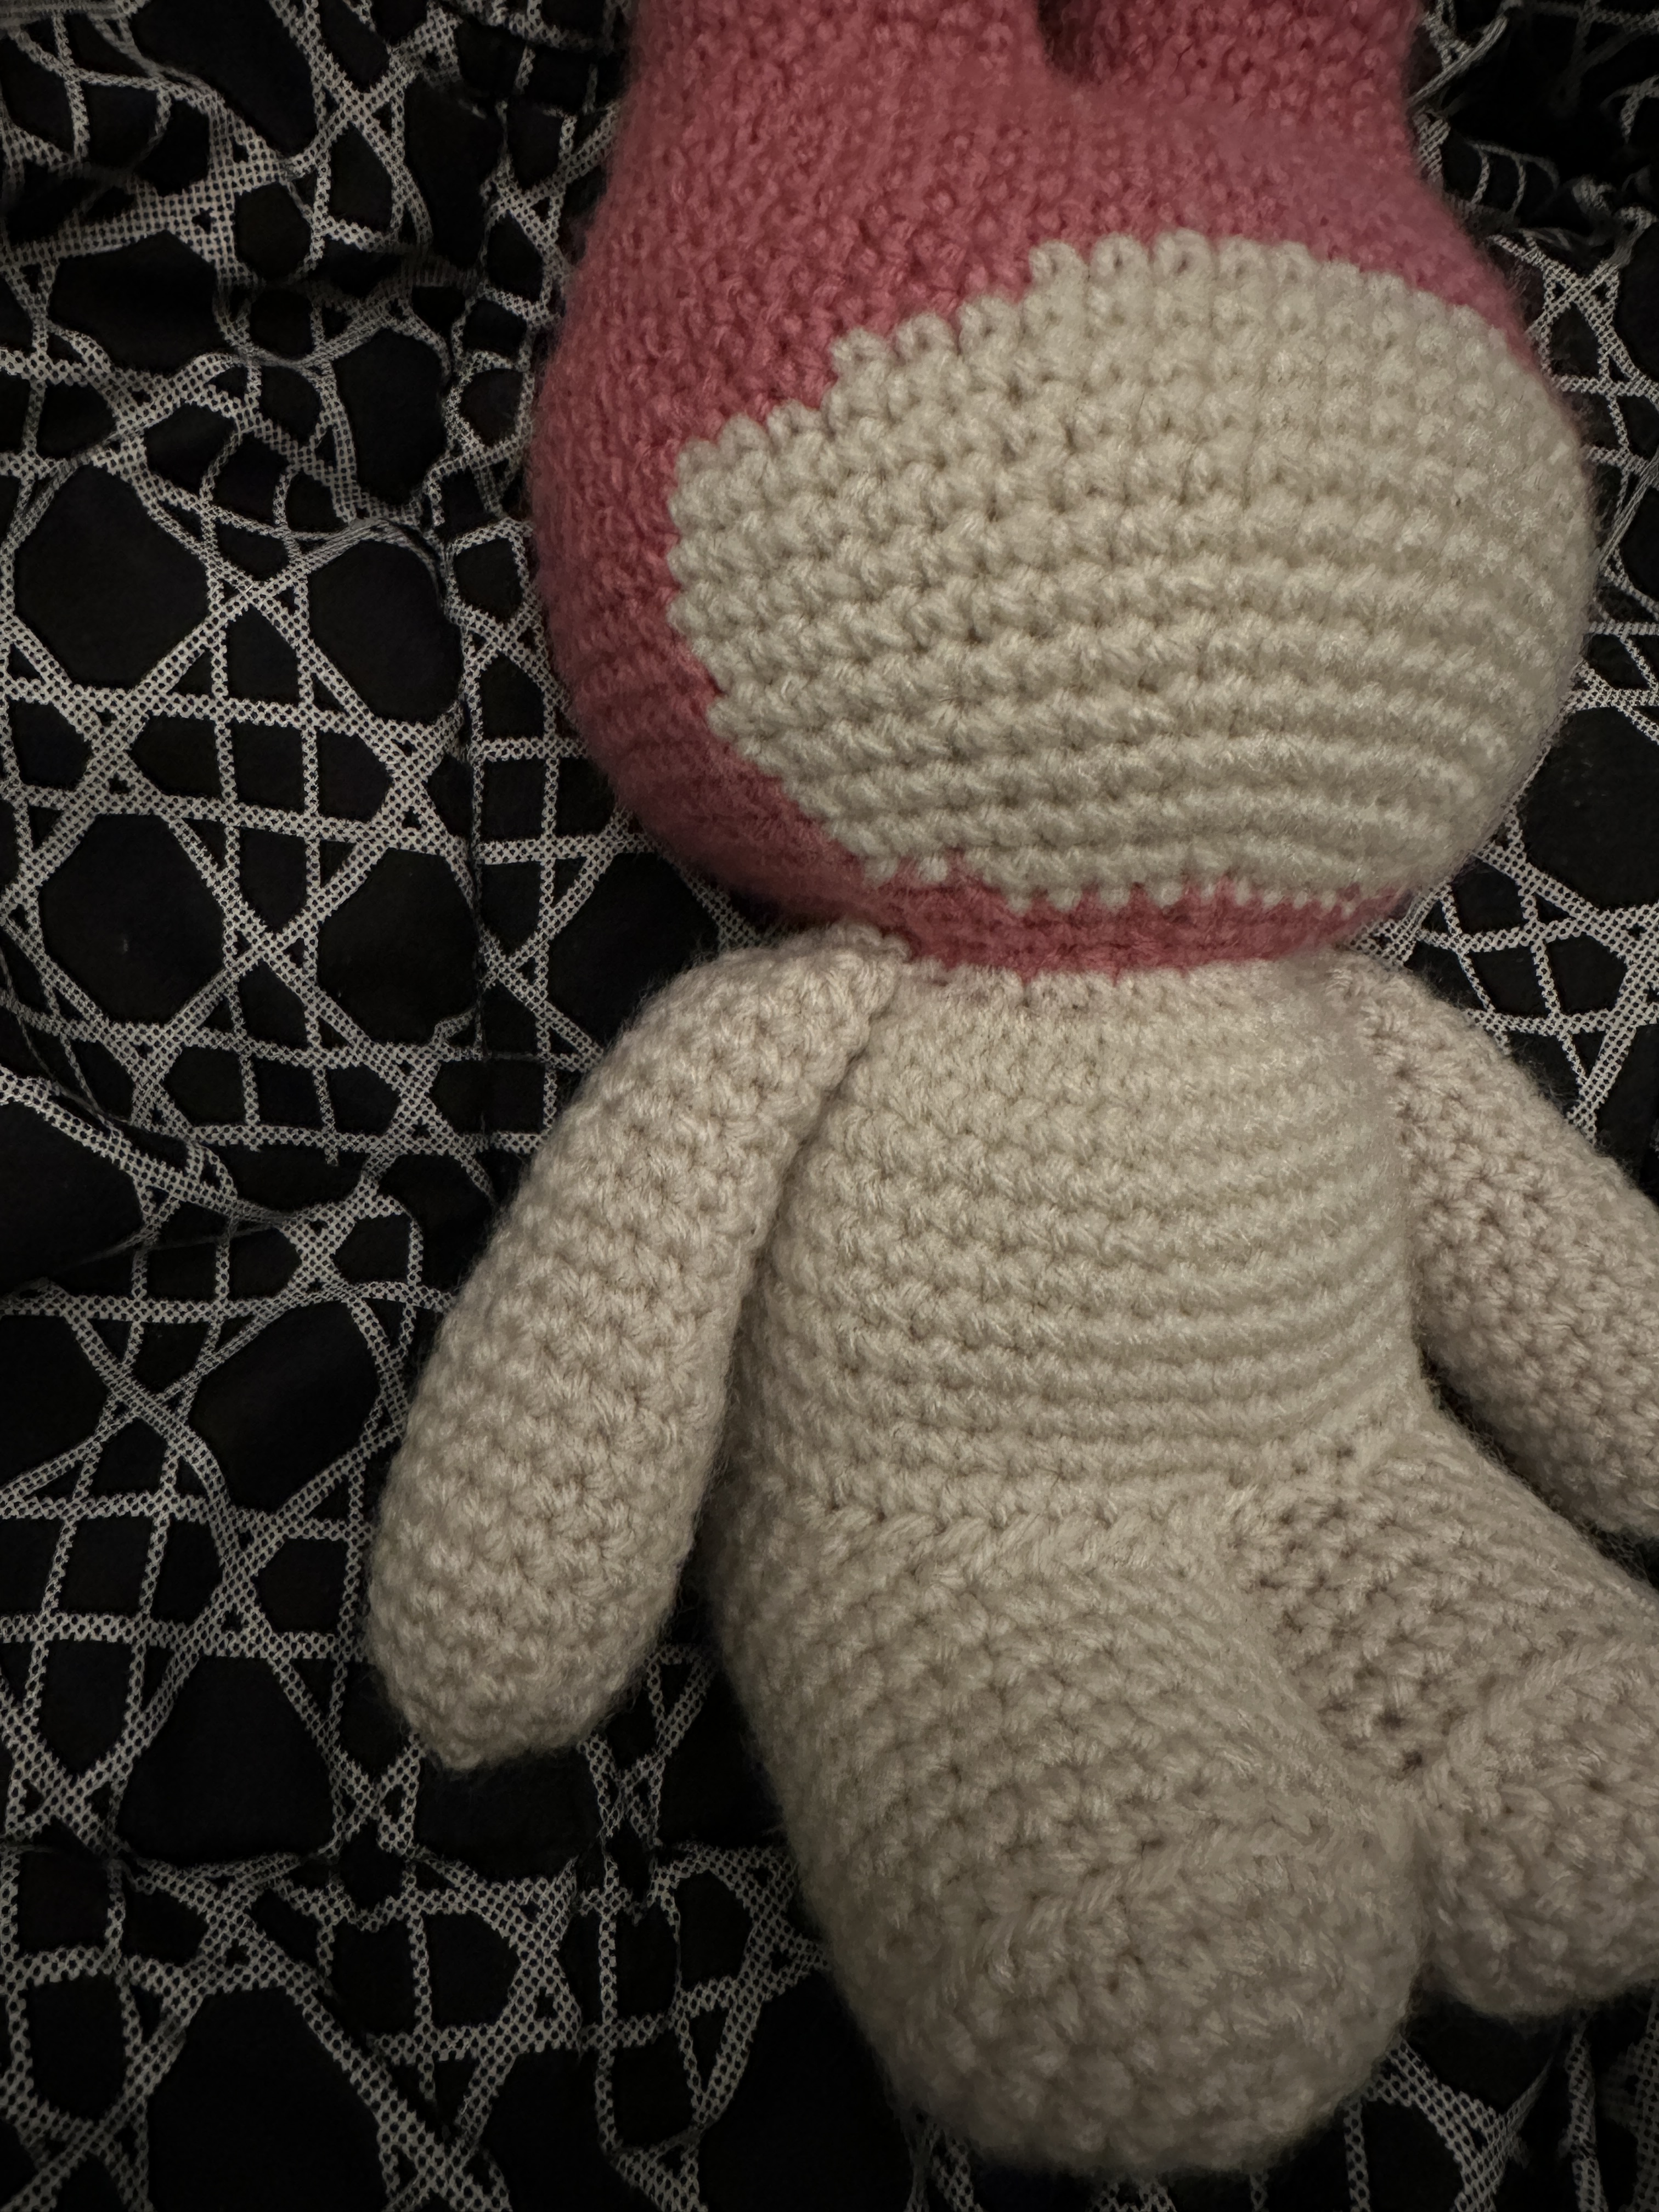
- After finishing the legs, sew them onto the body as shown in the pictures. See Figures 13-16.
Legs (Make 2):
- With cream color. 6sc in magic circle. (6)
- 2sc in each st. (12)
- (1sc in st. 2sc in st.) x 6 (18)
- (1sc in next 2st. 2sc in st.) x 6 (24)
- (1sc in next 7st. 2sc in st.) x 3. (27)
- 1sc in each st. For 16 rows. (27)
- (1sc in st. Sc2tog.) x 9 (18)
- Sc2tog x 9. (9)
- Sc2tog x 3. Sew gap closed.
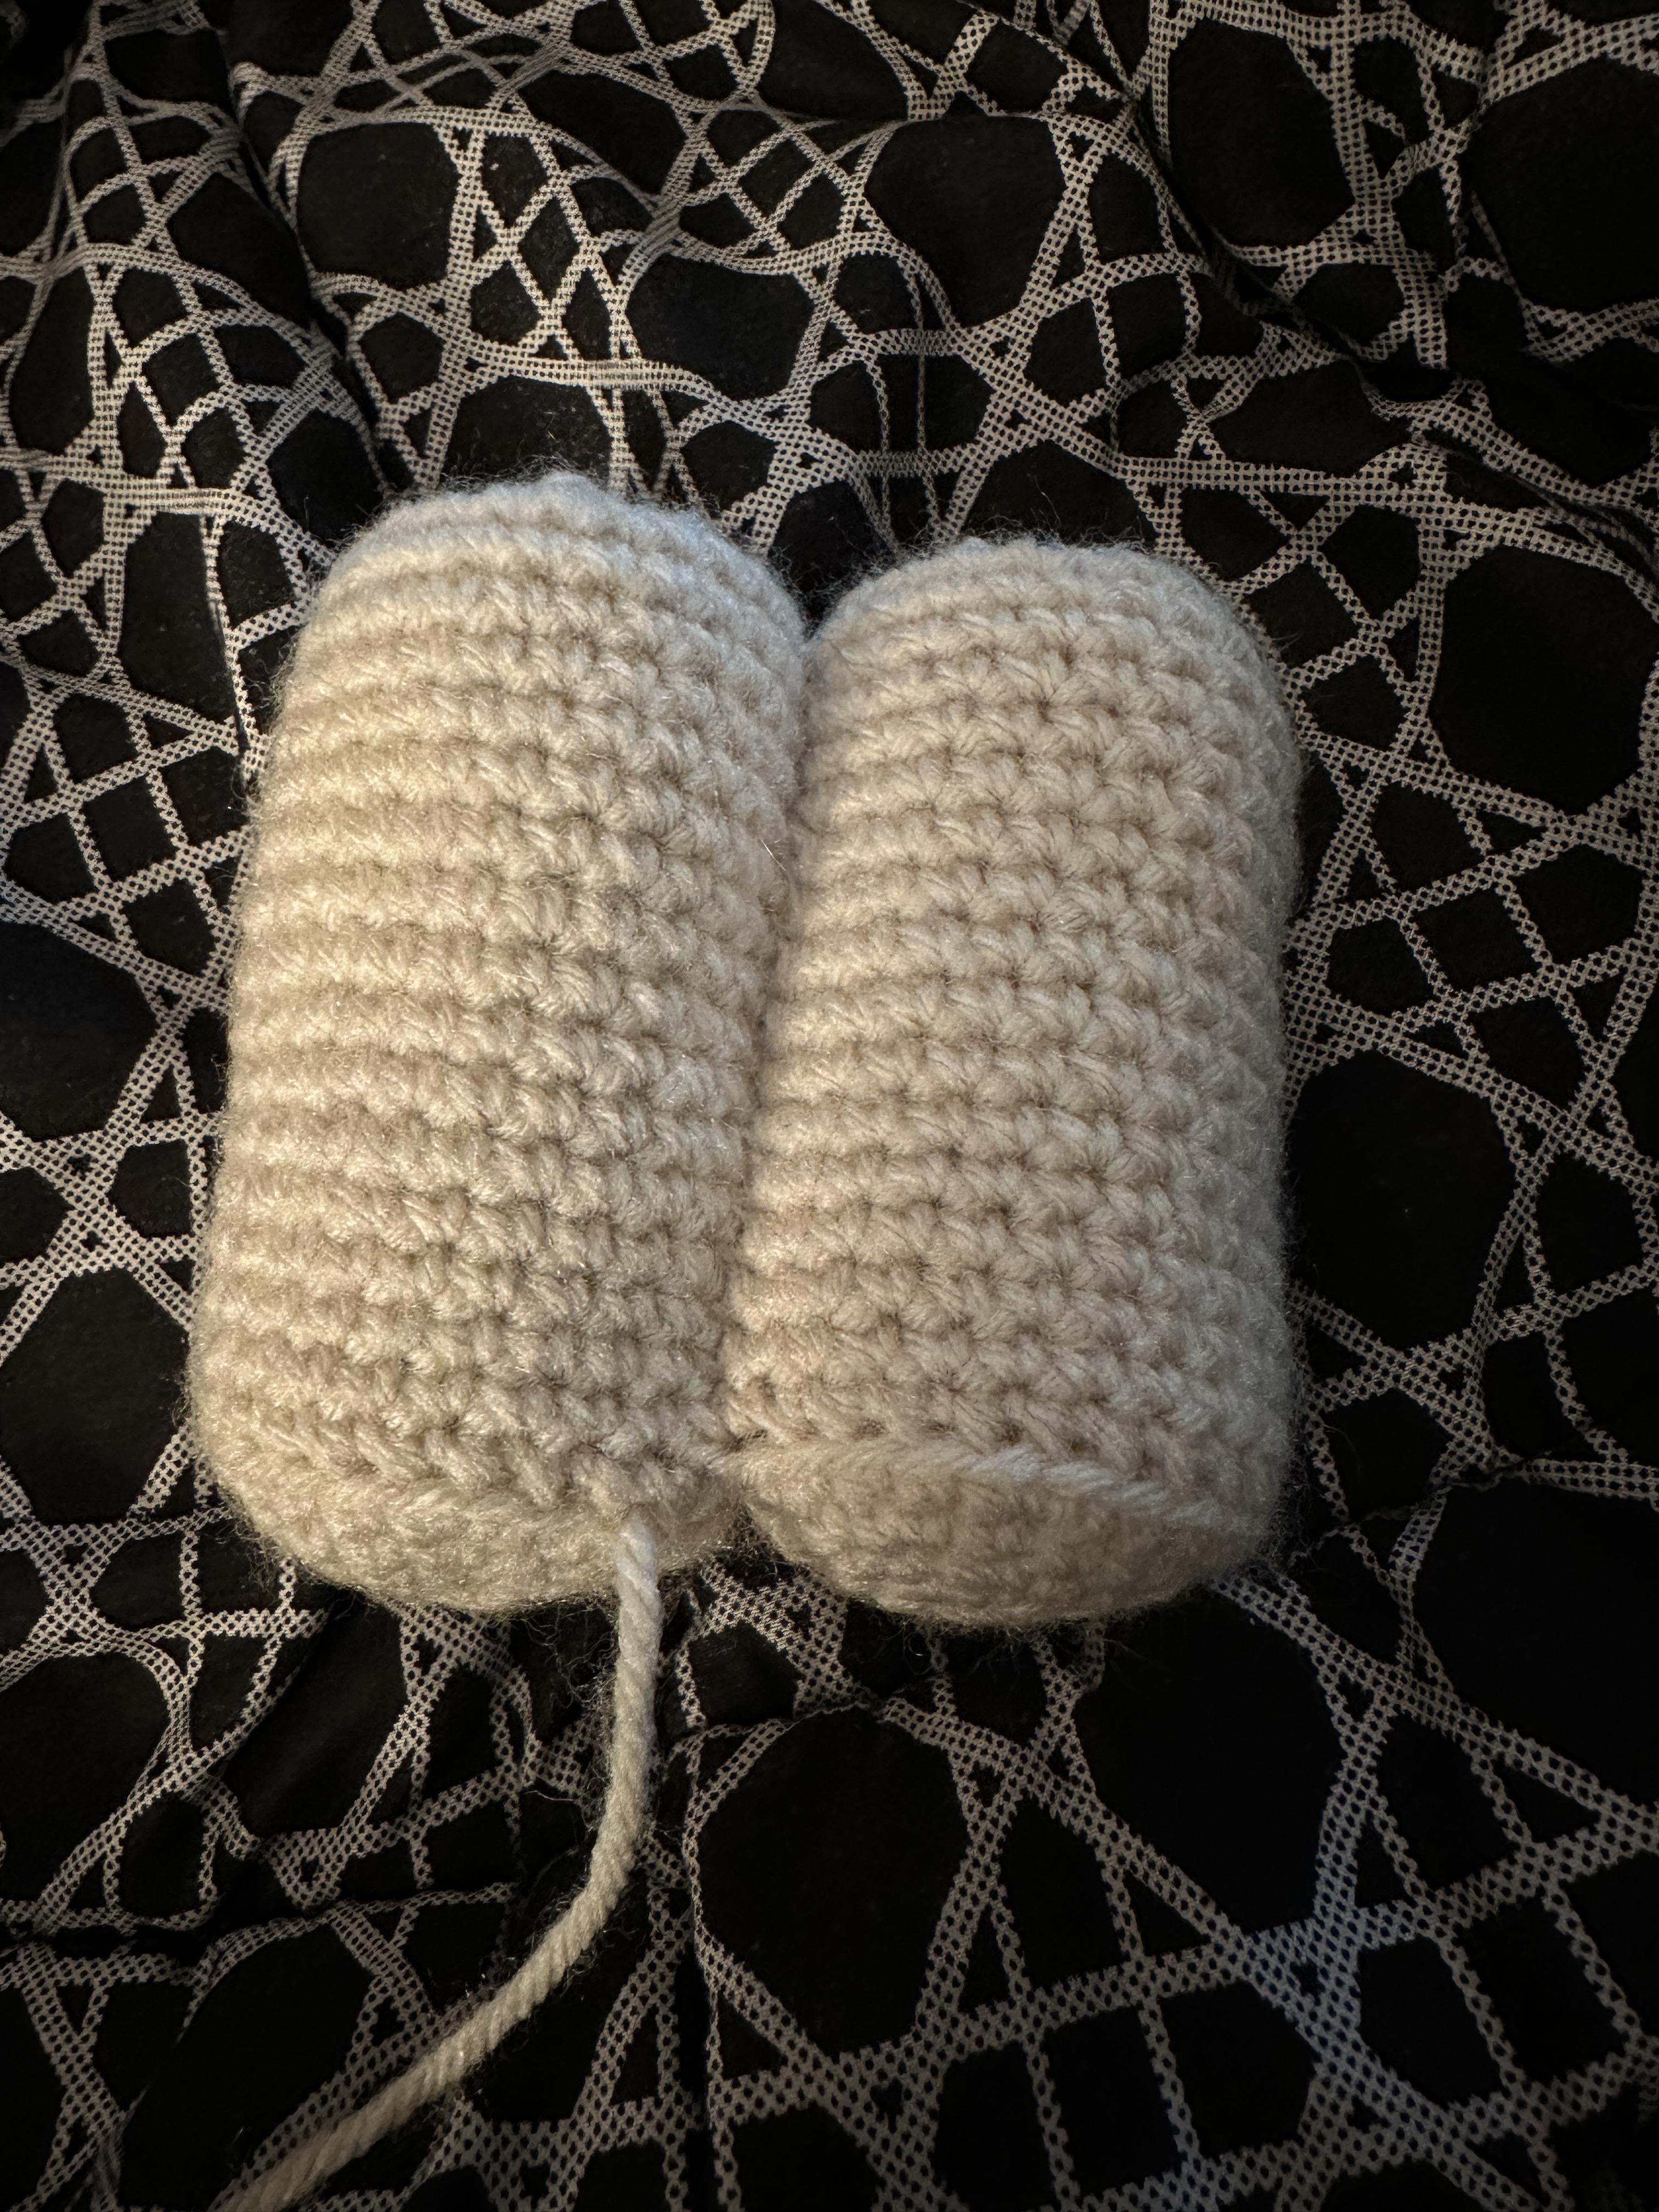
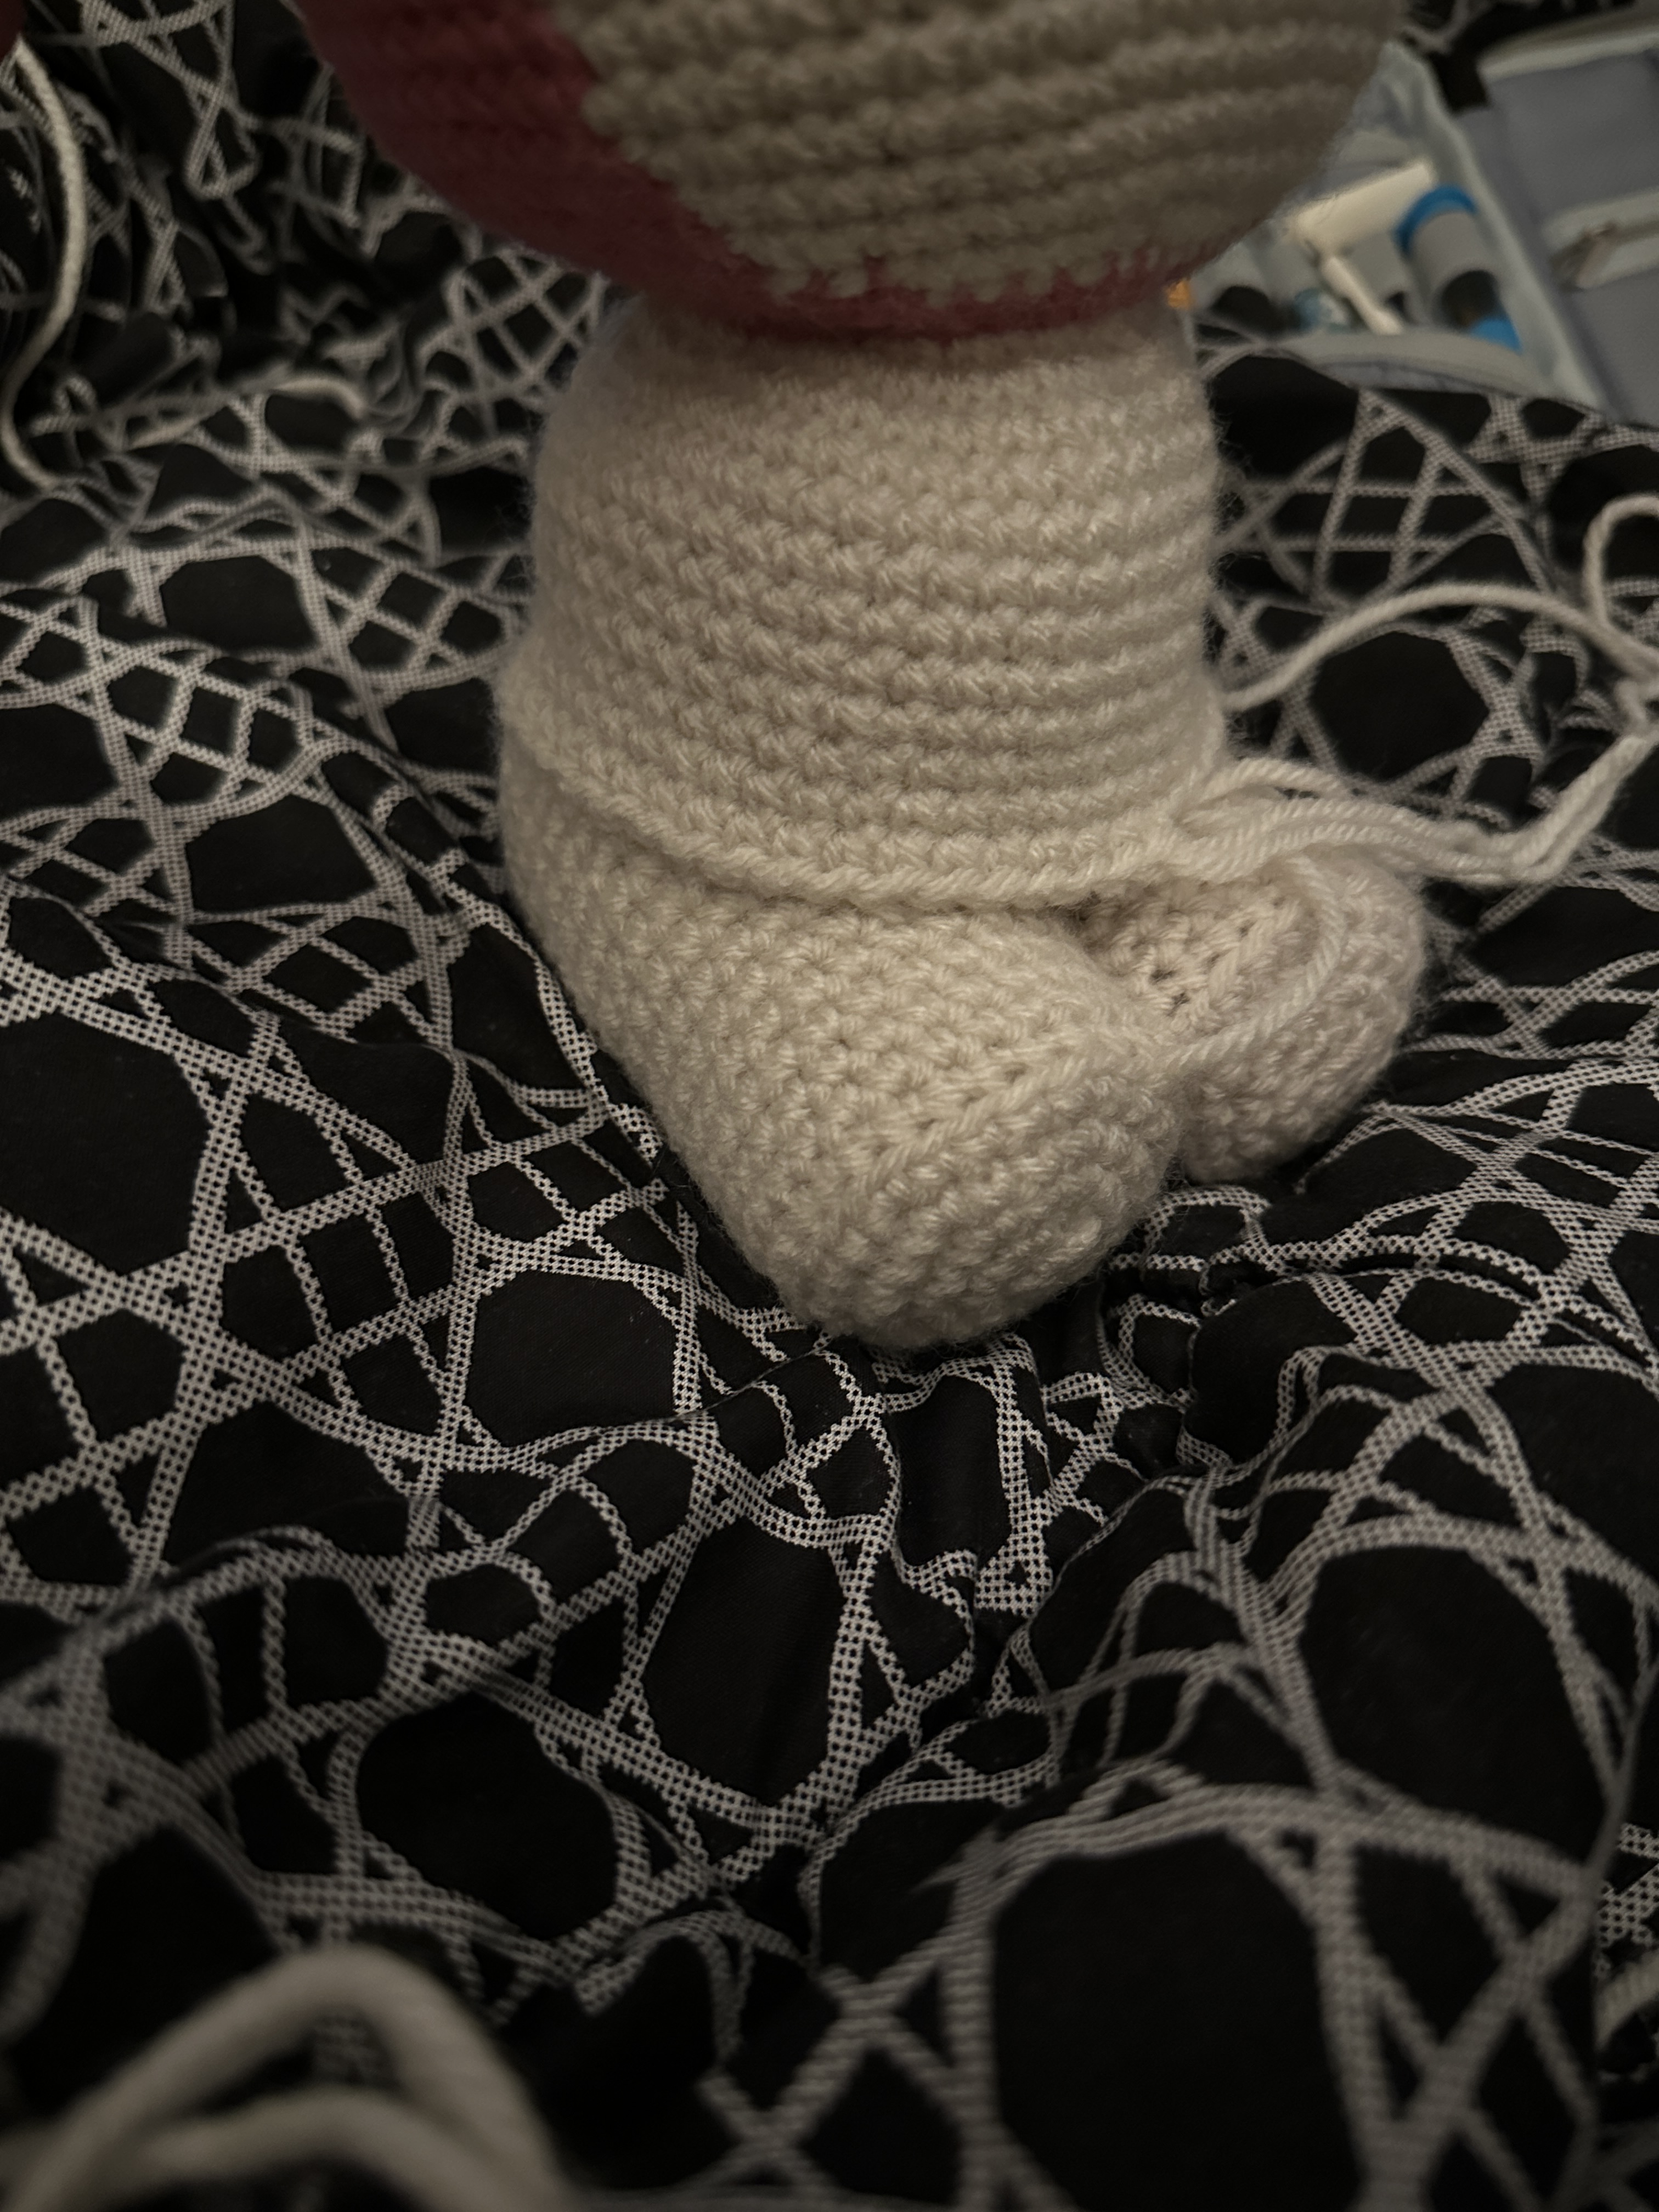
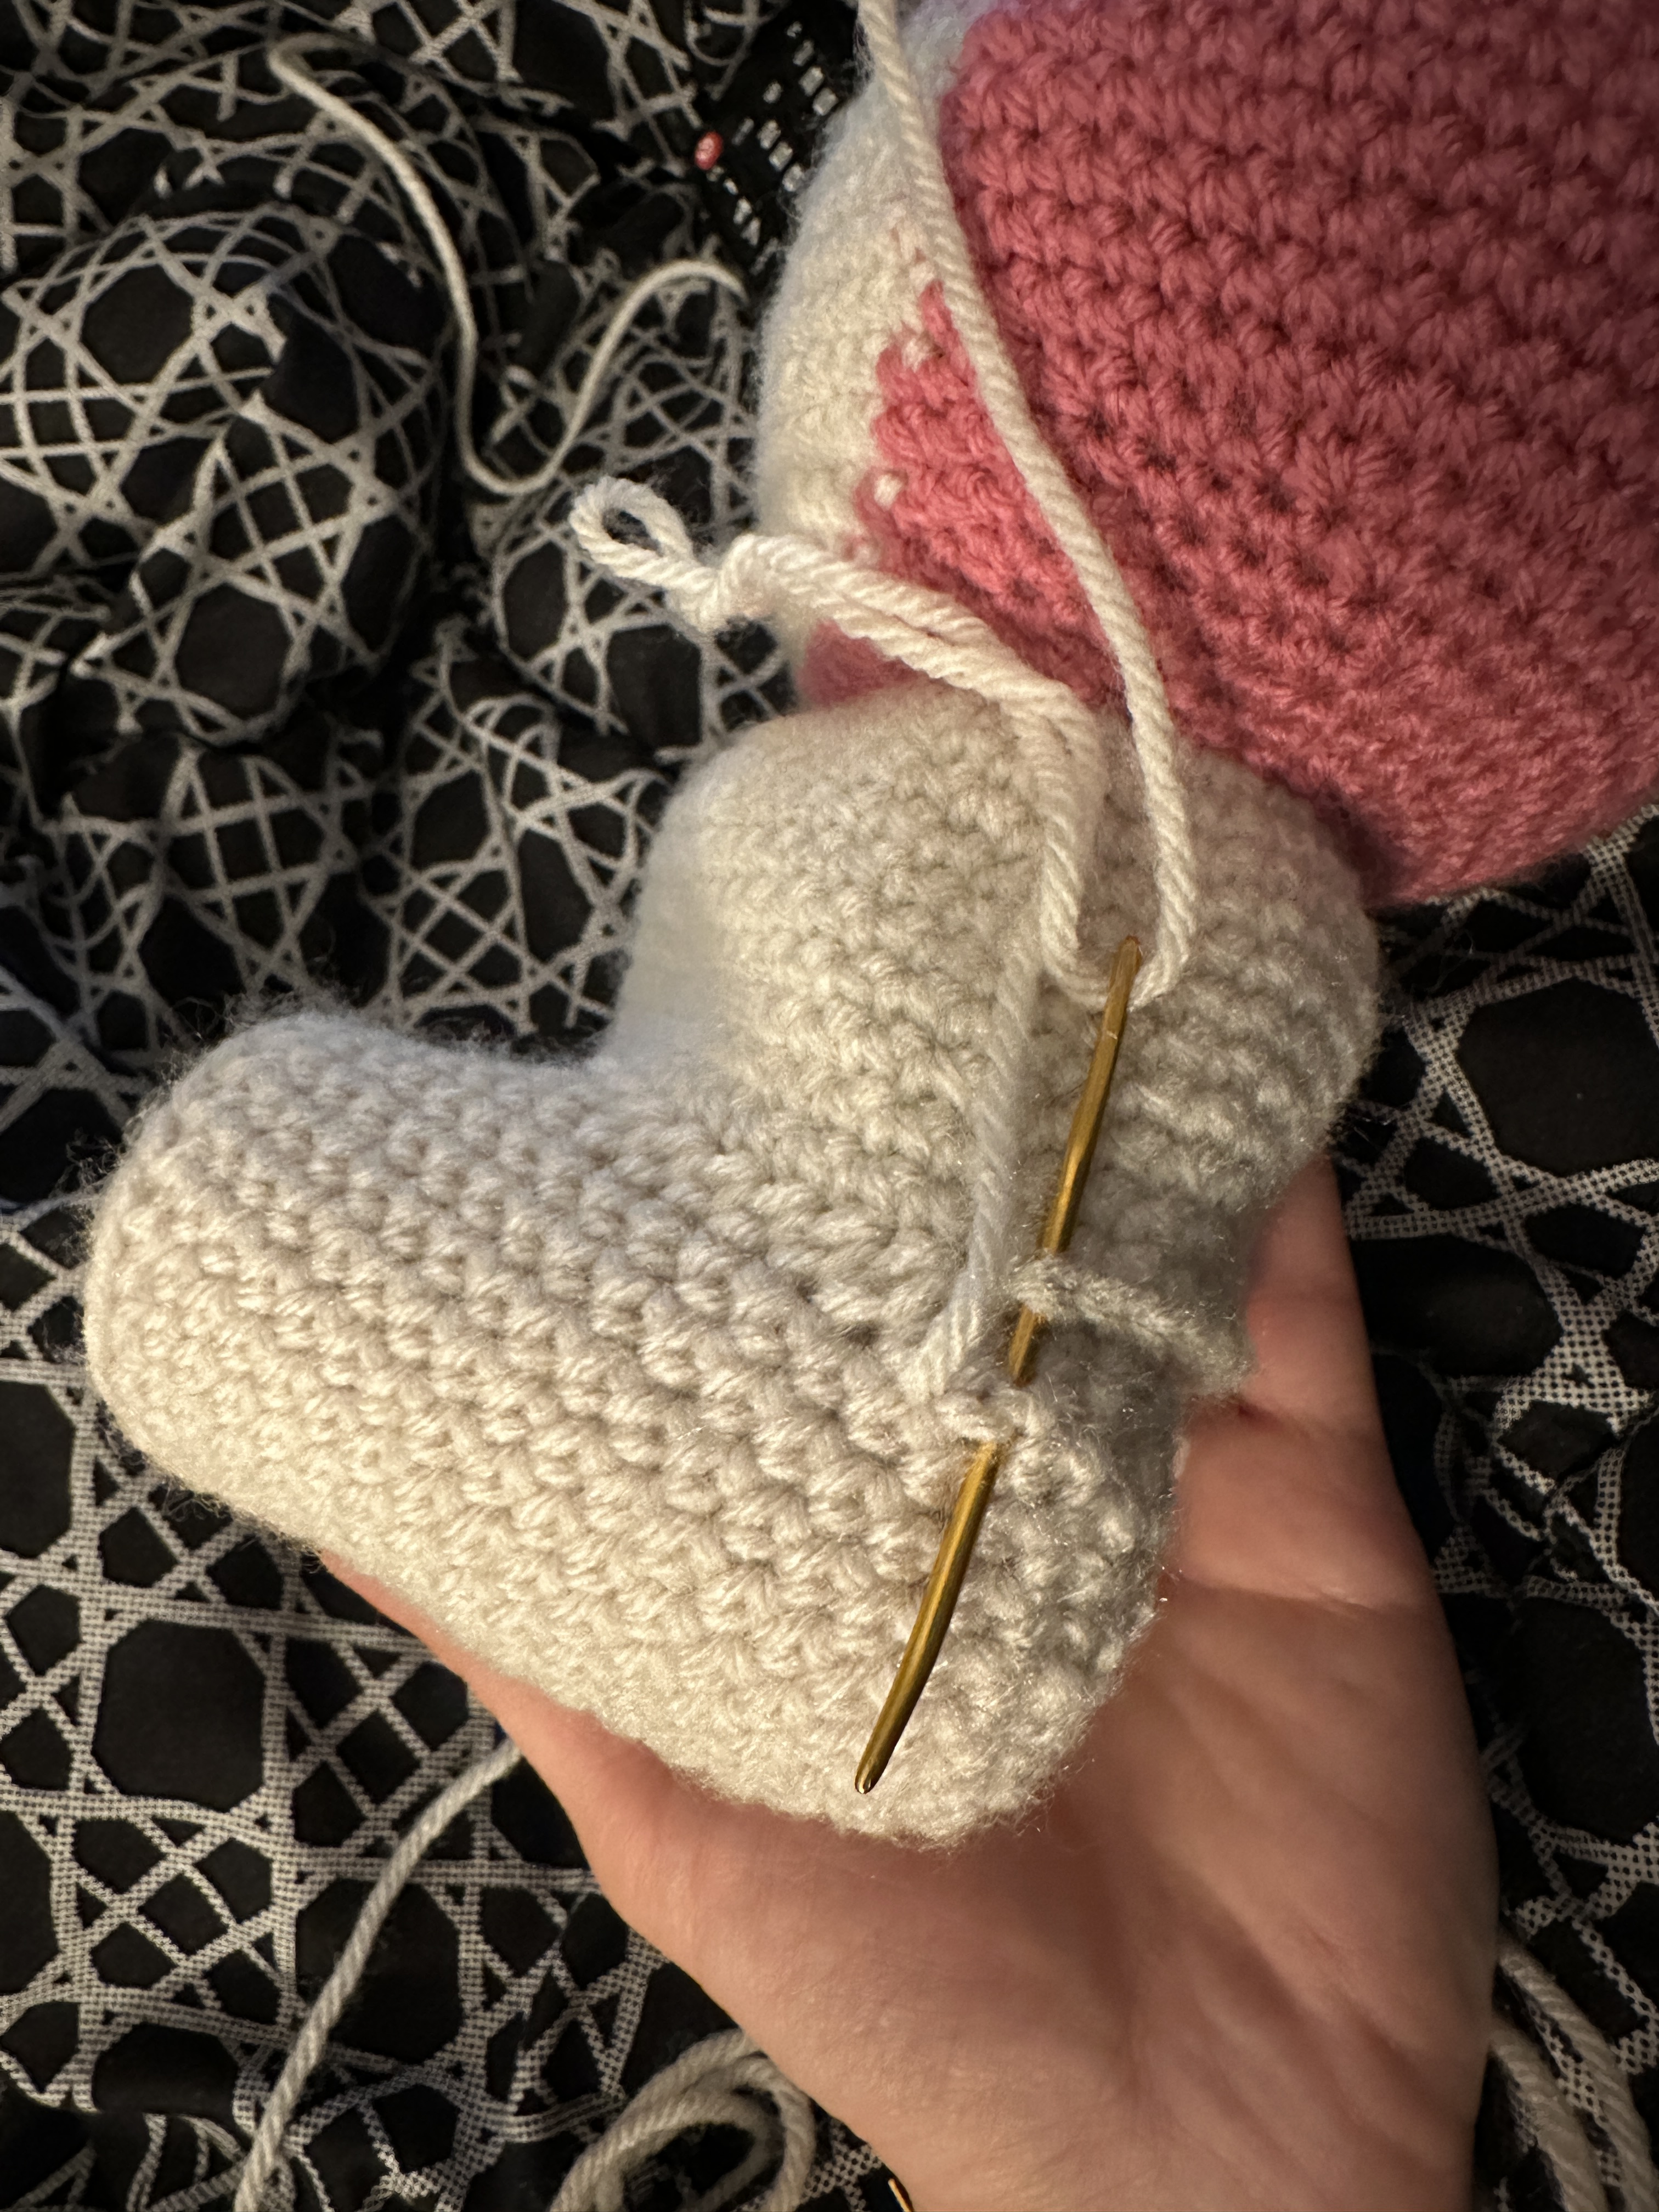
- Sew the legs together as shown in Figures 11 and 12.
- Then sew the legs onto the body as shown in Figures 13-16.
Arms (Make 2):
- With cream color. 6sc in magic circle. (6)
- 2sc in each st. (12)
- (1sc in st. 2sc in st.) x 6 (18)
- 1sc in each st. For 7 rows. (18)
- (1sc in next 4st. Sc2tog.) x 3 (15)
- 1sc in each st. For 3 rows.
- (1sc in next 3st. Sc2tog.) x 3 (12)
- 1sc in each st. For 3 rows.
- (1sc in next 2st. Sc2tog) x 3 (9)
- (1sc in st. Sc2tog.) x 3 (6)
- FO. Sew gap closed.
- Sew arms on, making sure to put the smaller part at the top. See Figures 18 and 19.
Hat Collar (this part goes around her neck):
- With pink color. Chain 28.
- 1sc in each chain starting in the second chain from the hook. (27)
- Chain 1. Turn. 1sc in each st. (27)
- Chain 1. Turn. (1sc in next 8st. 2sc in st.) x 3 (30)
- Chain 1. Turn. (1sc in next 5st. 2sc in st.) x 6 (36)
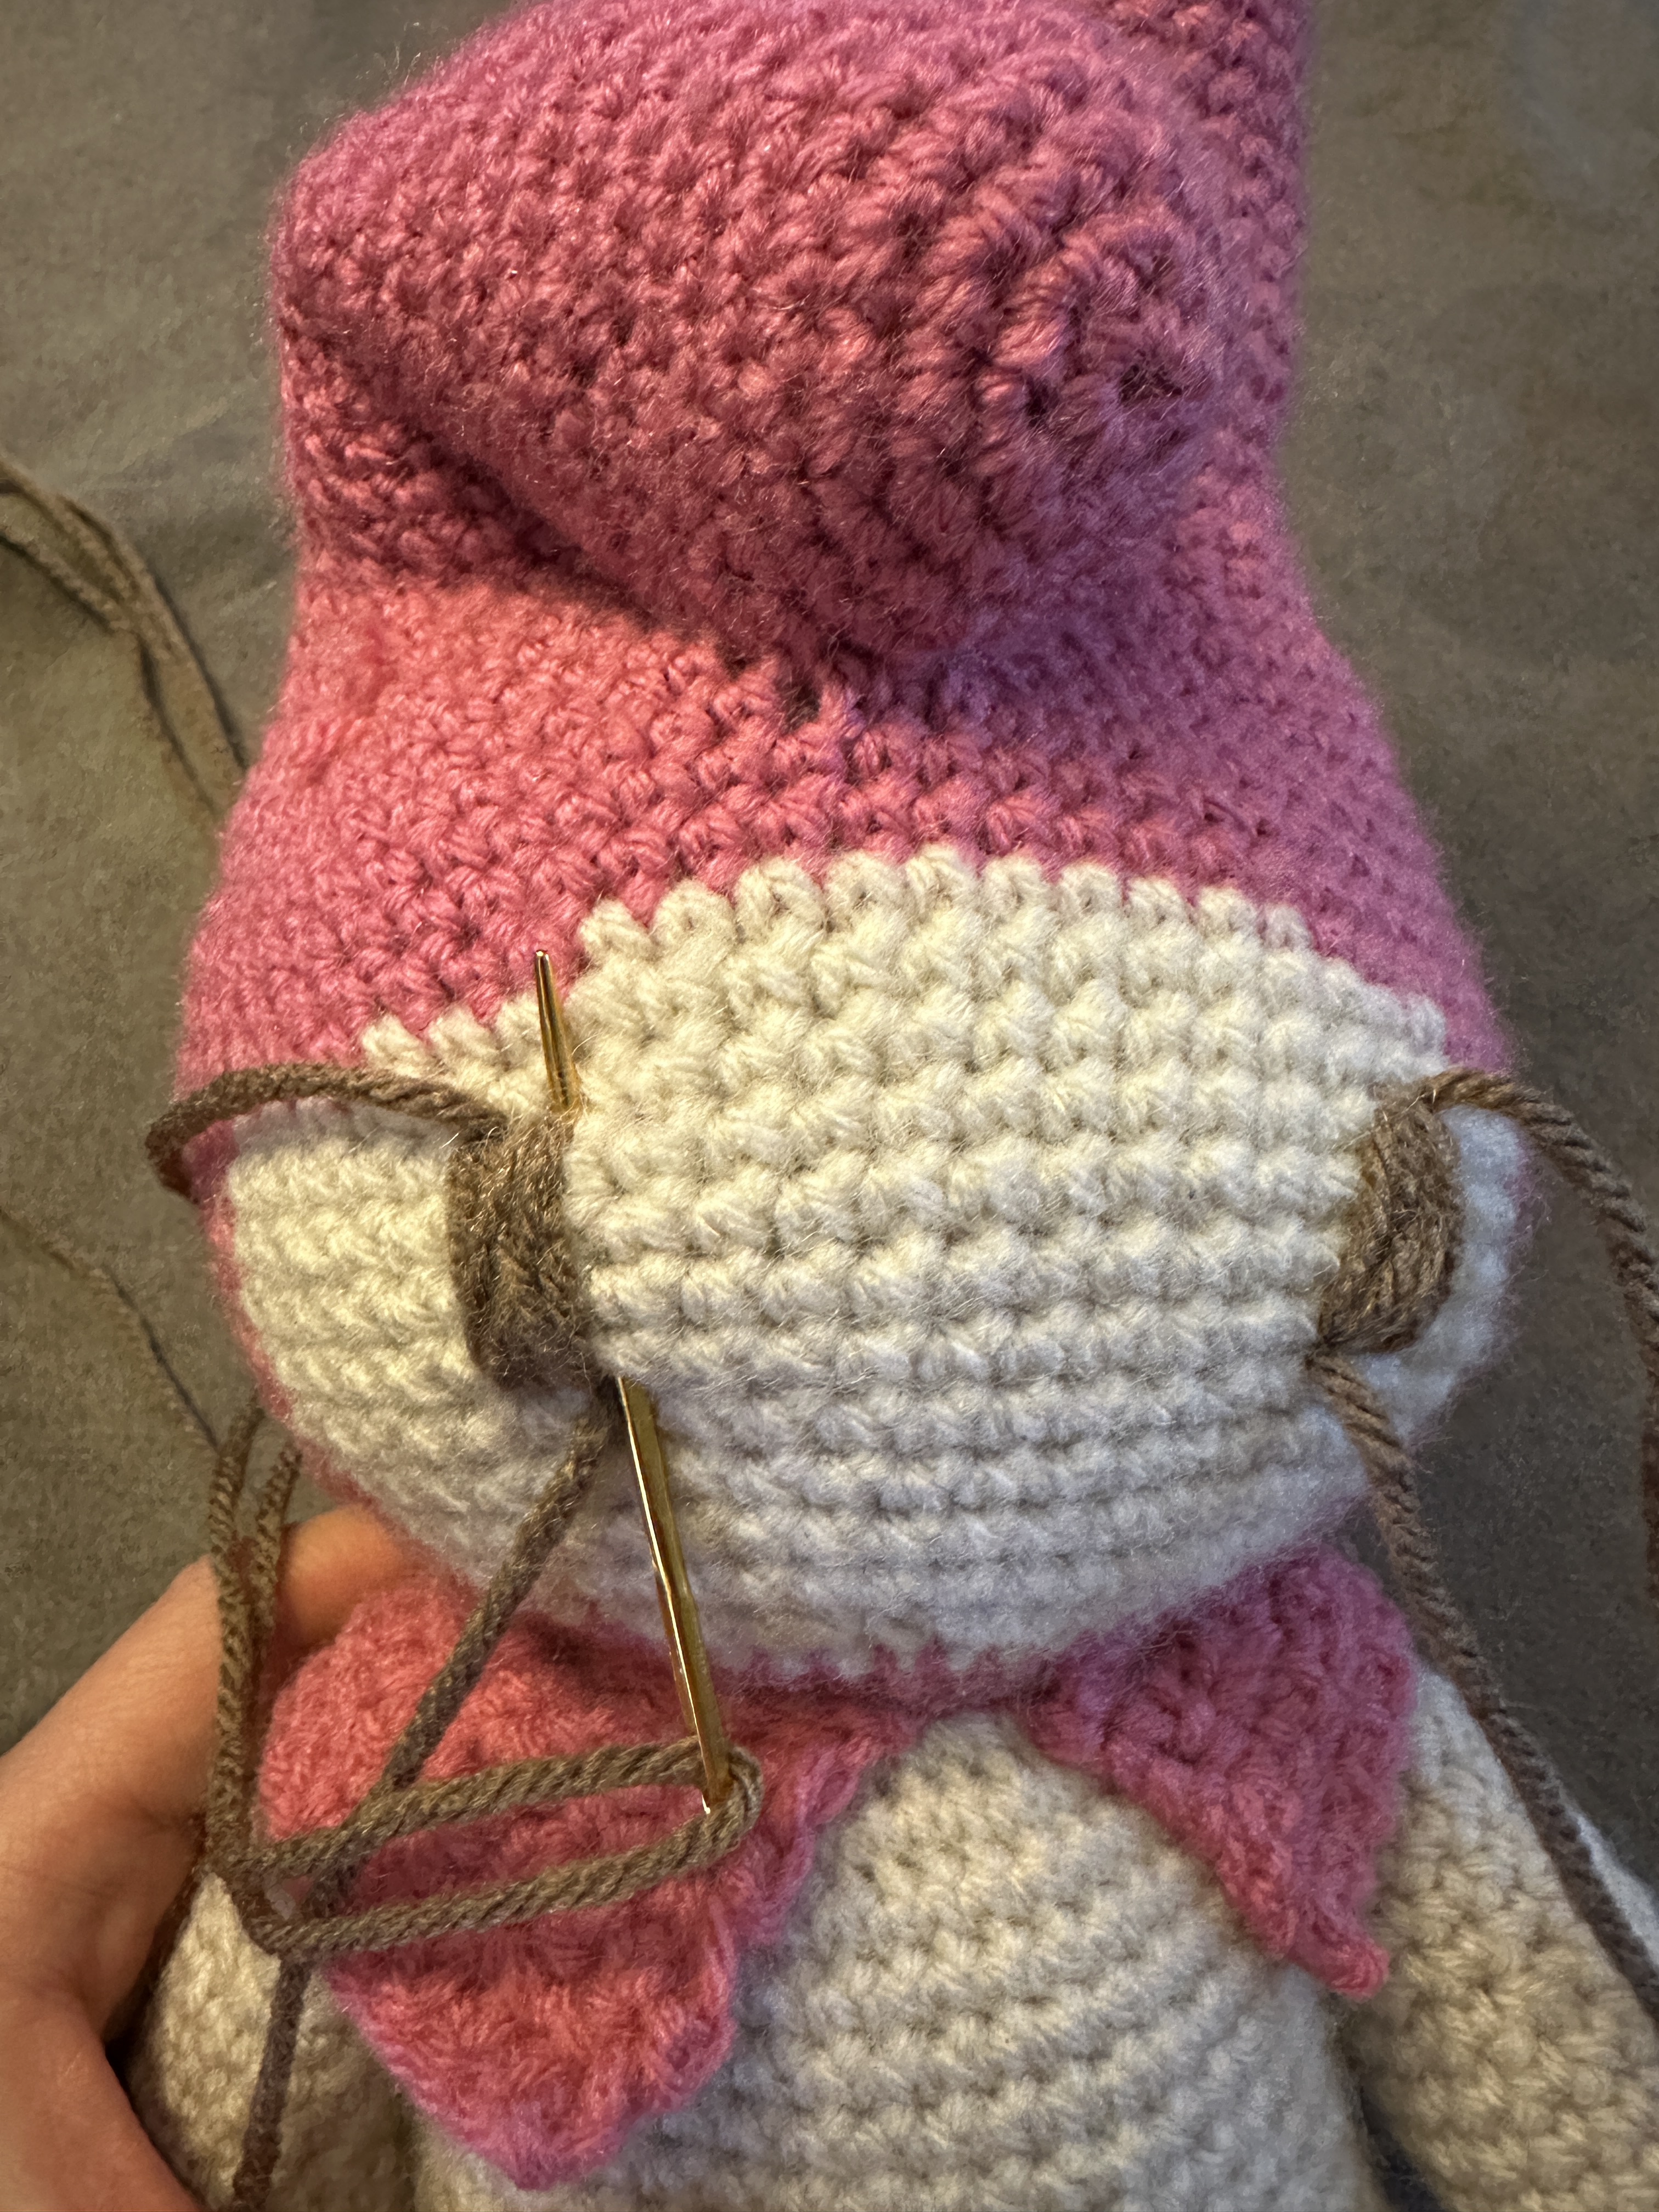
- Chain 1. Turn. 1sc in each st. Do this for 2 rows. Sew around her neck. See Figures 21-23.
Fold one of the ears down and sew it to secure it. See Figures 24 and 25.
Flower:
- We will first make the petals. Use purple color. 6sc in magic circle. (6)
- 1sc in each st. (6)
- 2sc in each st. (12)
- 1sc in each st. (12)
- (1sc in st. 2sc in st.) x 6 (18)
- 1sc in each st. For 3 rows. (18)
- (1sc in st. Sc2tog.) x 6. (12)
- Sc2tog x 6. (6)
- Sew gap closed. Do not stuff.
- Make 5 other petals. Then sew them together. See Figures 26 and 27.
- For the middle part of the flower, use gold color. 6sc in magic circle. (6)
- 2sc in each st. (12)
- FO. Then sew this onto the middle of the flower (Figure 28). Sew the flower onto her head. I placed my flower on the side of the folded ear (Figures 35 and 36).
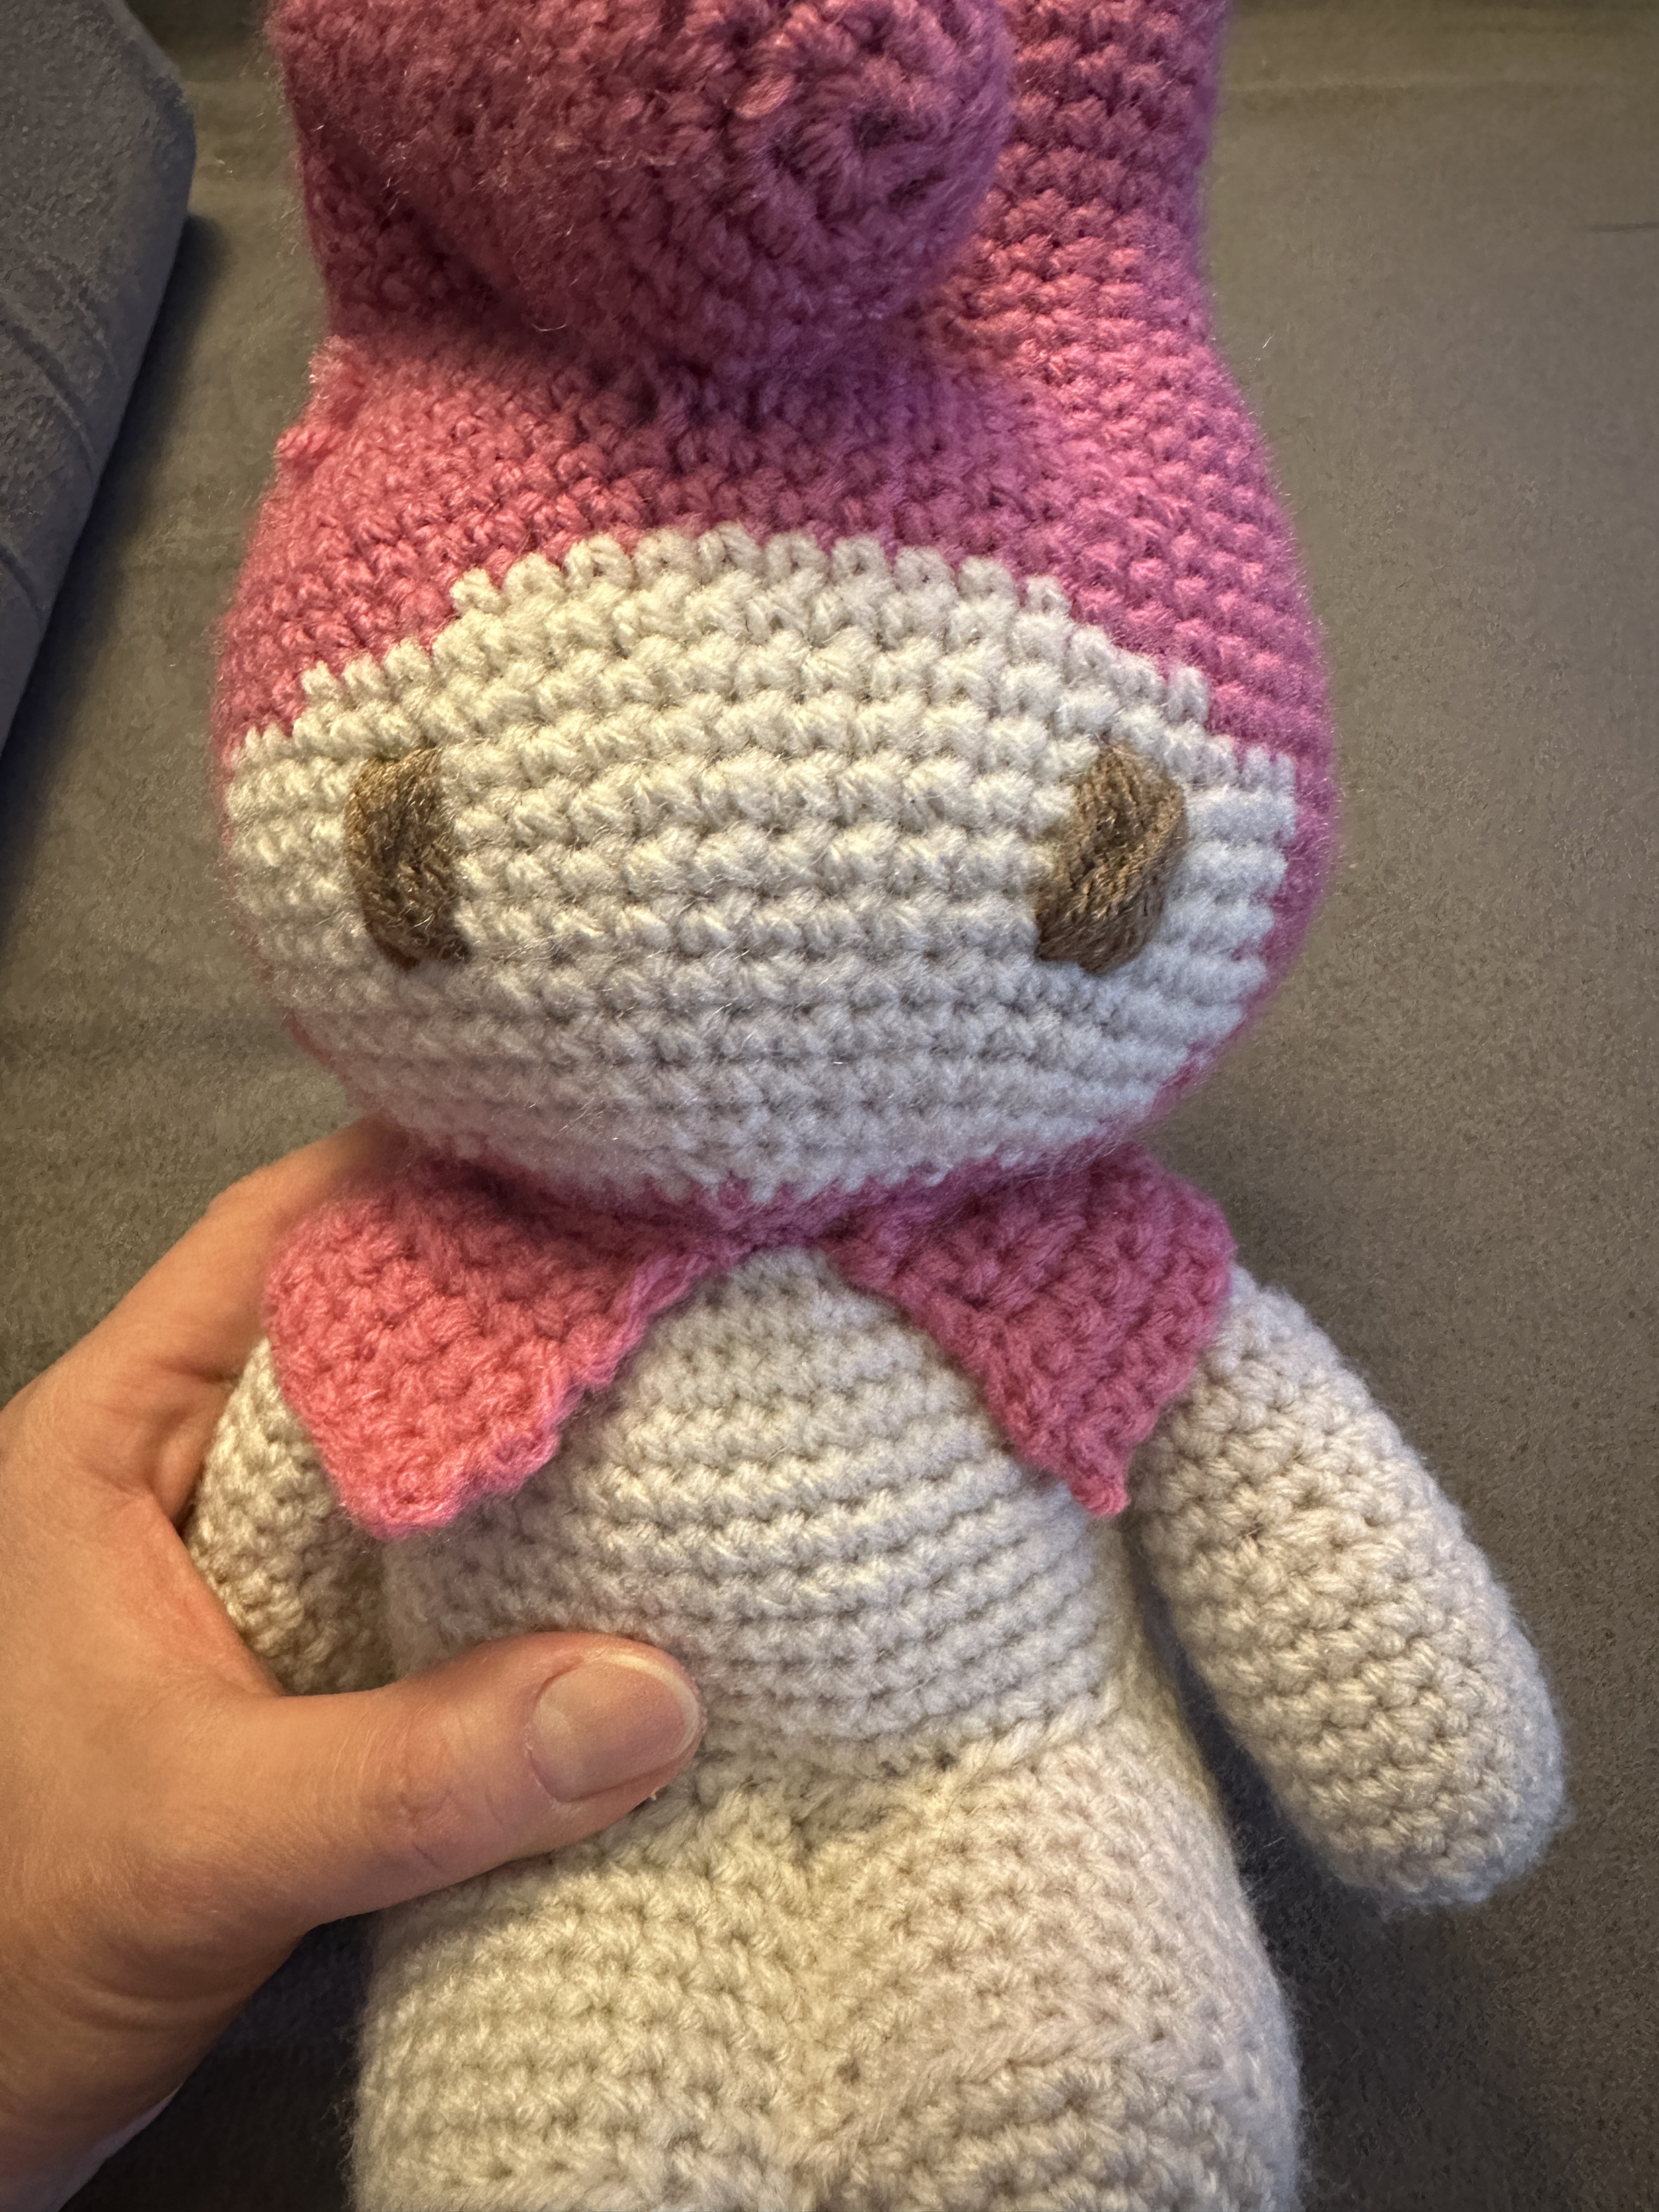
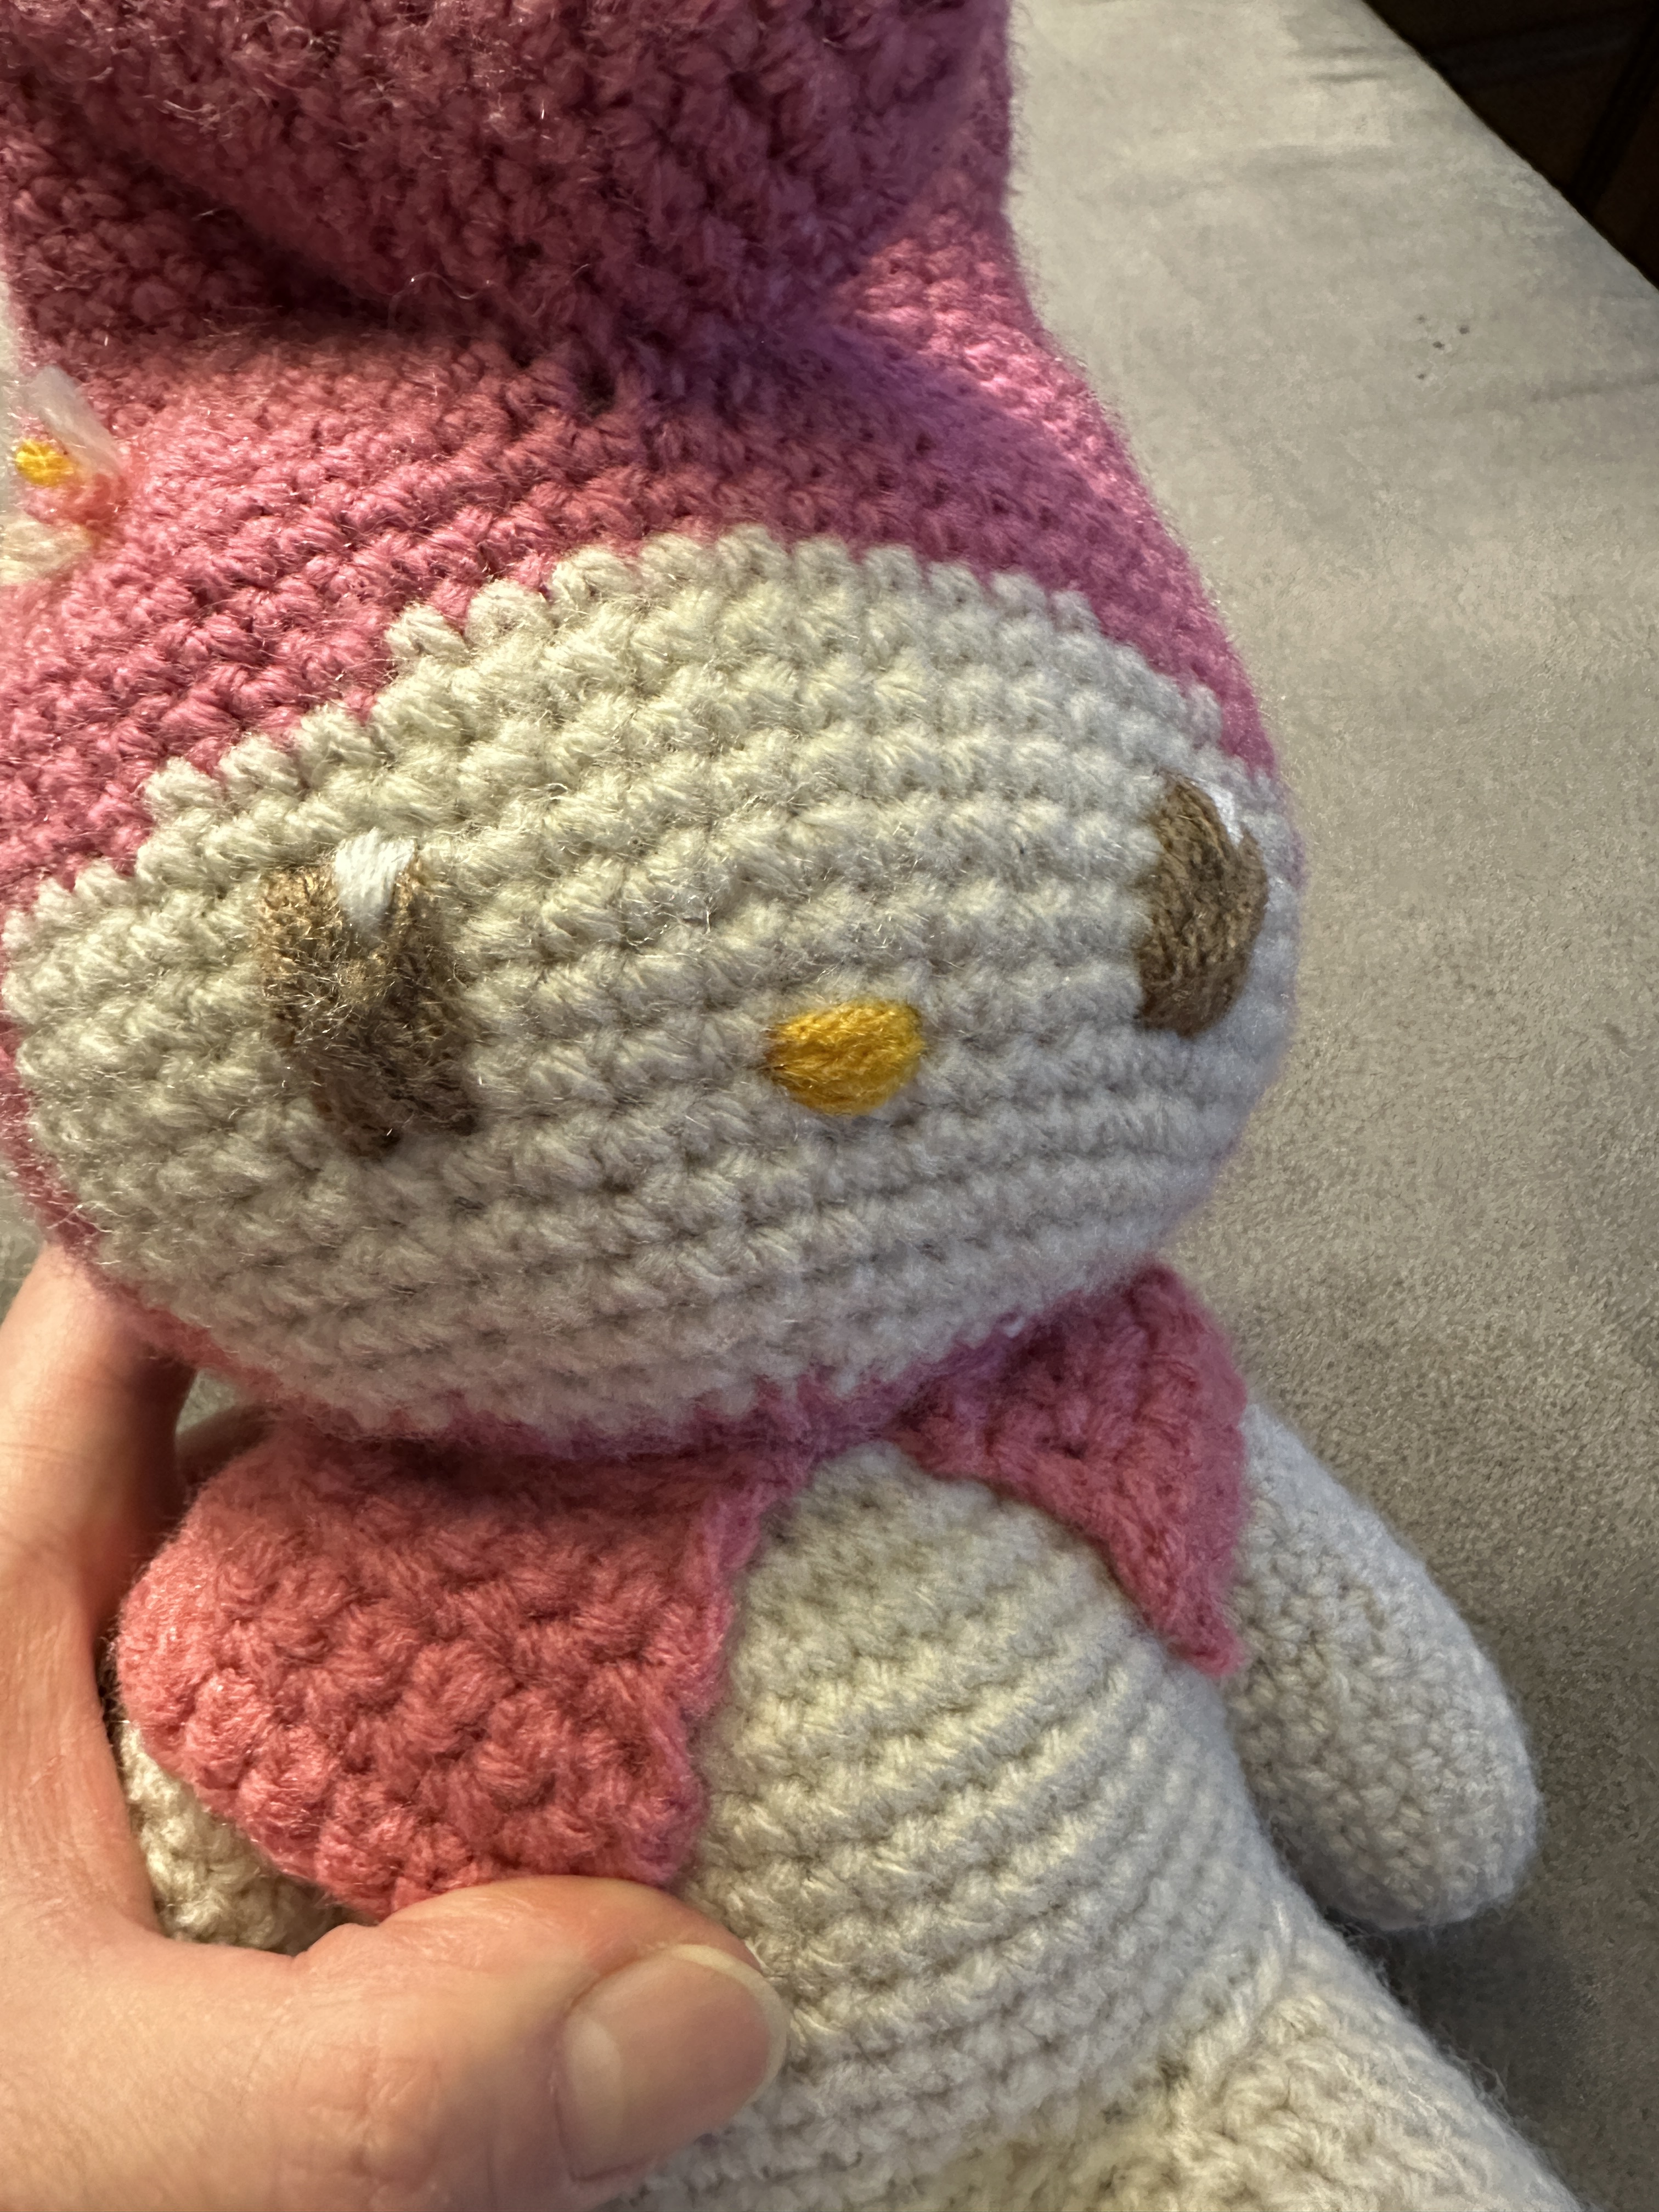
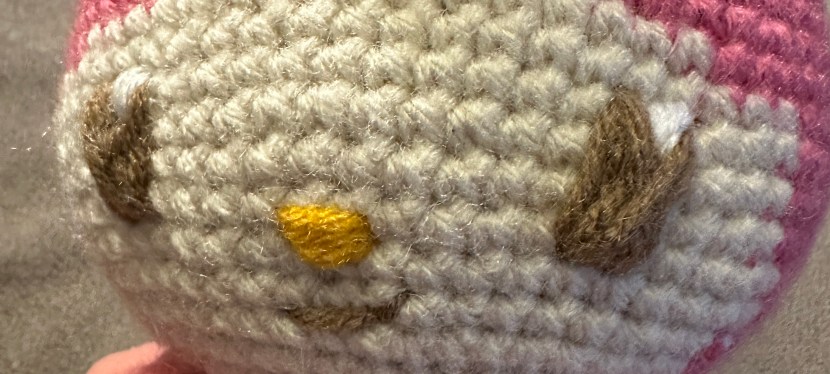
Face:
- Use brown yarn to embroider her eyes. I used white at the corners of her eyes to make them more alive.
- Use gold yarn to embroider her nose.
- Finally, use brown yarn to embroider her mouth.
- Use the images as a guide for what shapes to make the eyes, nose and mouth. See Figures 29-34.